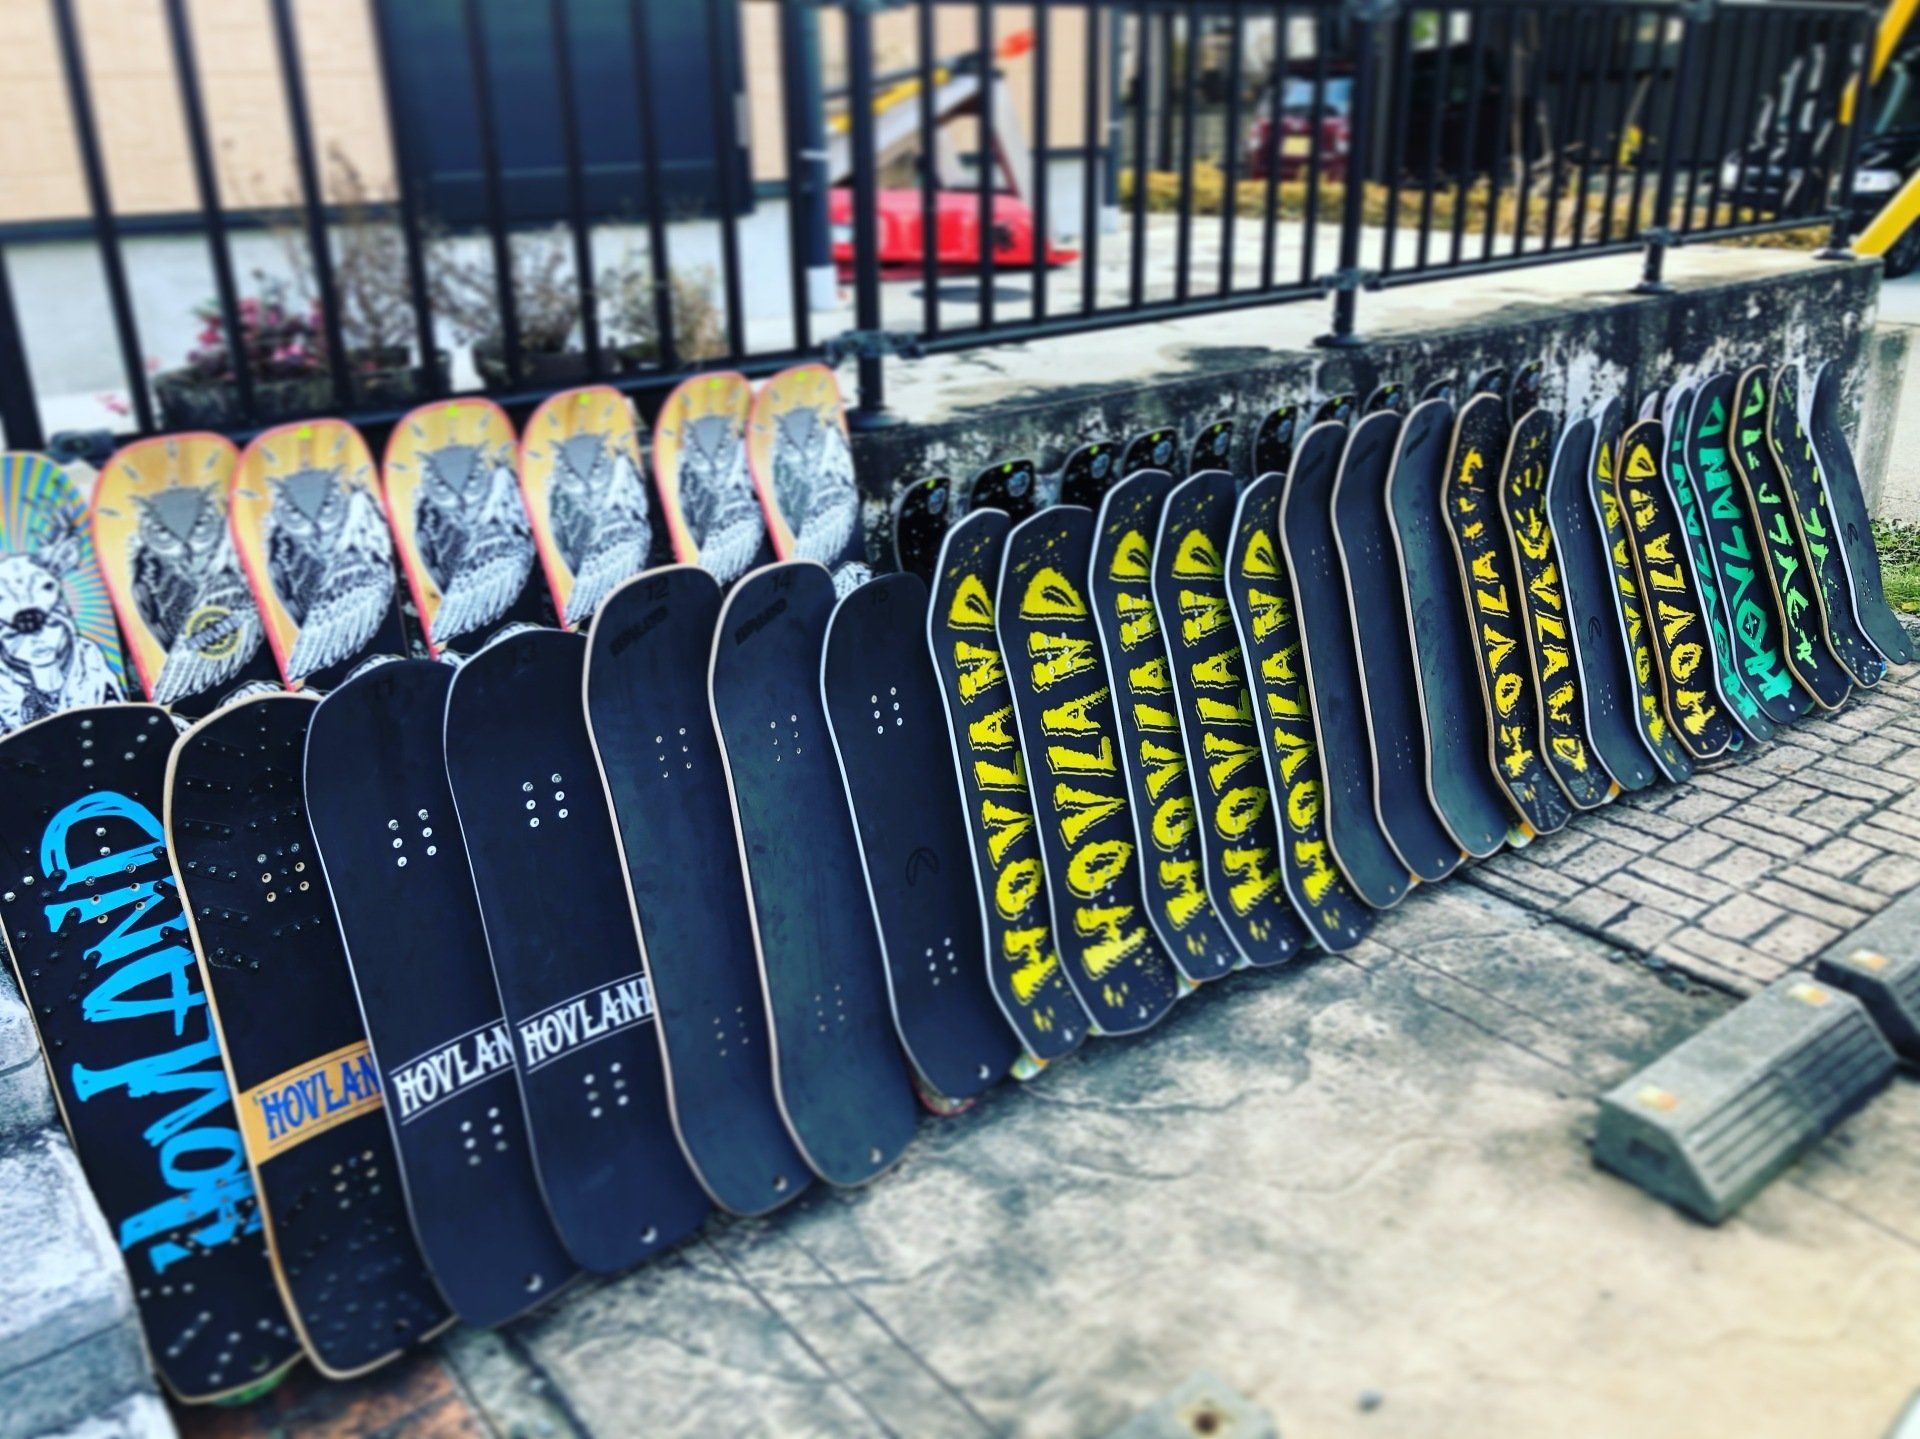


HOVLAND Japan
Snowskate
Assembling
and Setting
How to assemble and set up a snowskate
This guide explains how to assemble and set up a snowskate.
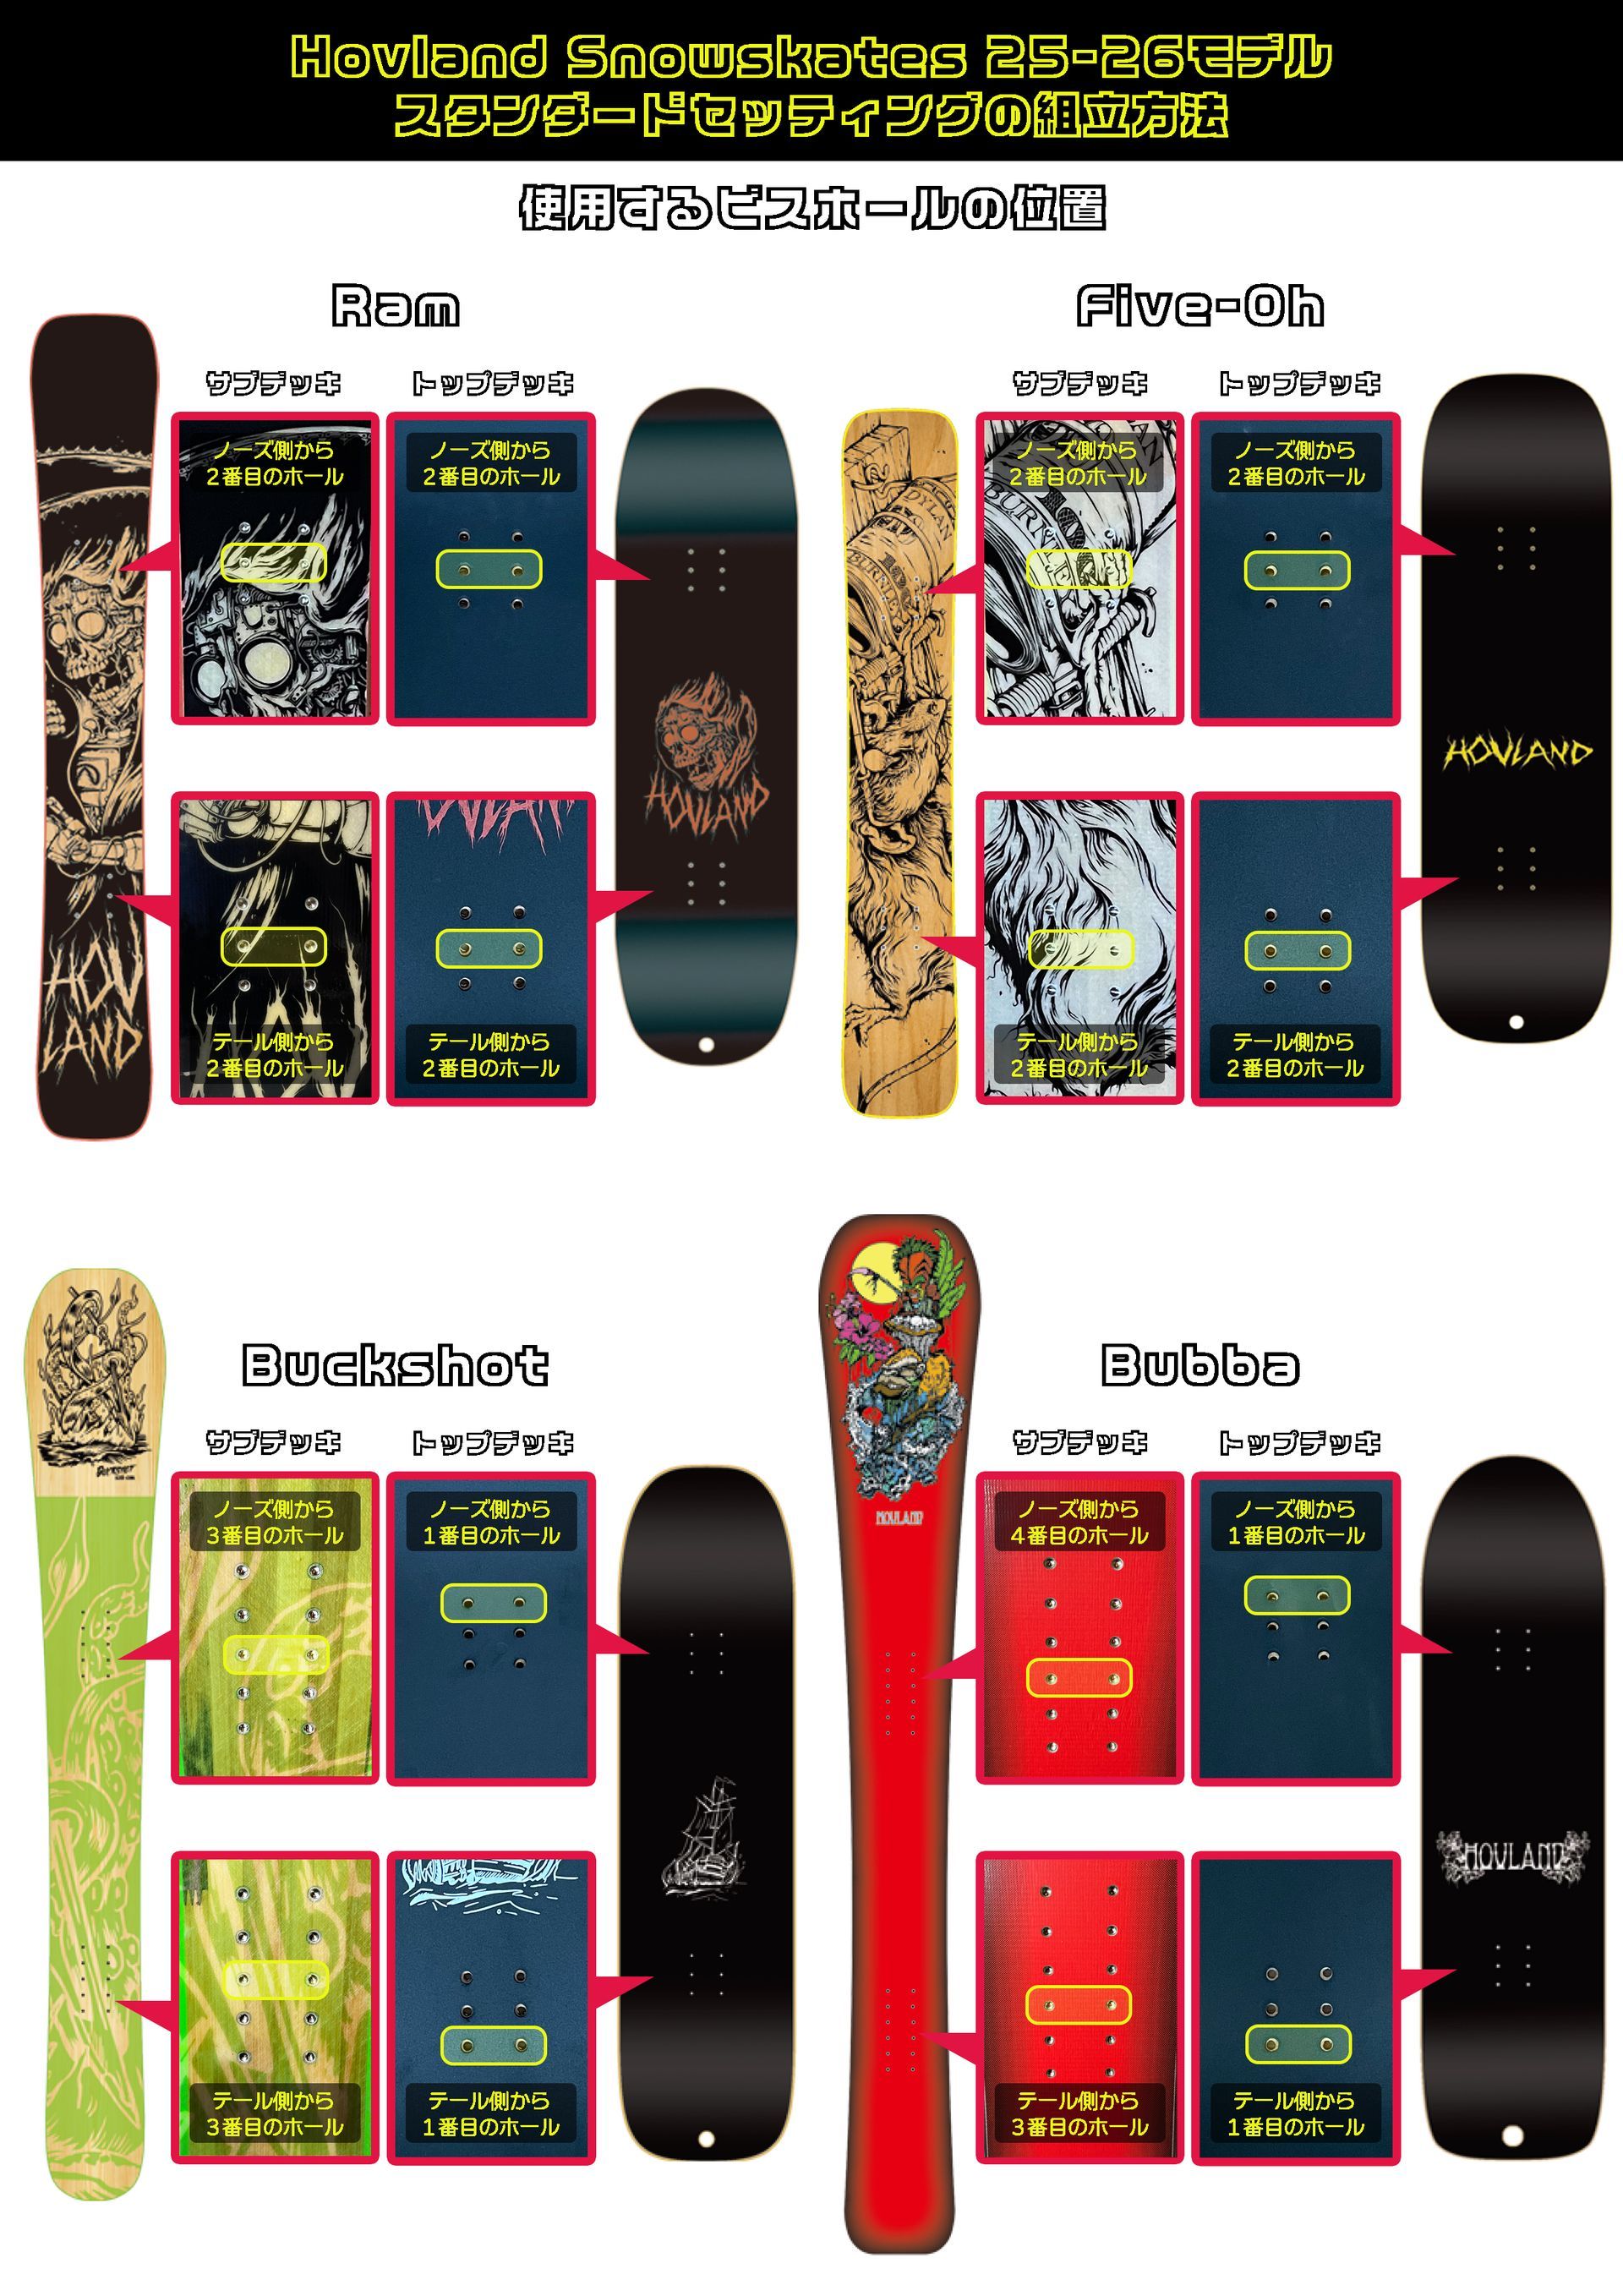
The riding feel of a snowskate changes dramatically depending on the settings. Even changing the position of just one screw hole on the sub-deck or top deck can have a noticeable effect.
First, try the standard ride feel with the center hole, and then experiment with different settings to suit your preferences.
Try different settings and discover your own preferred setup!
How to assemble a snowskate
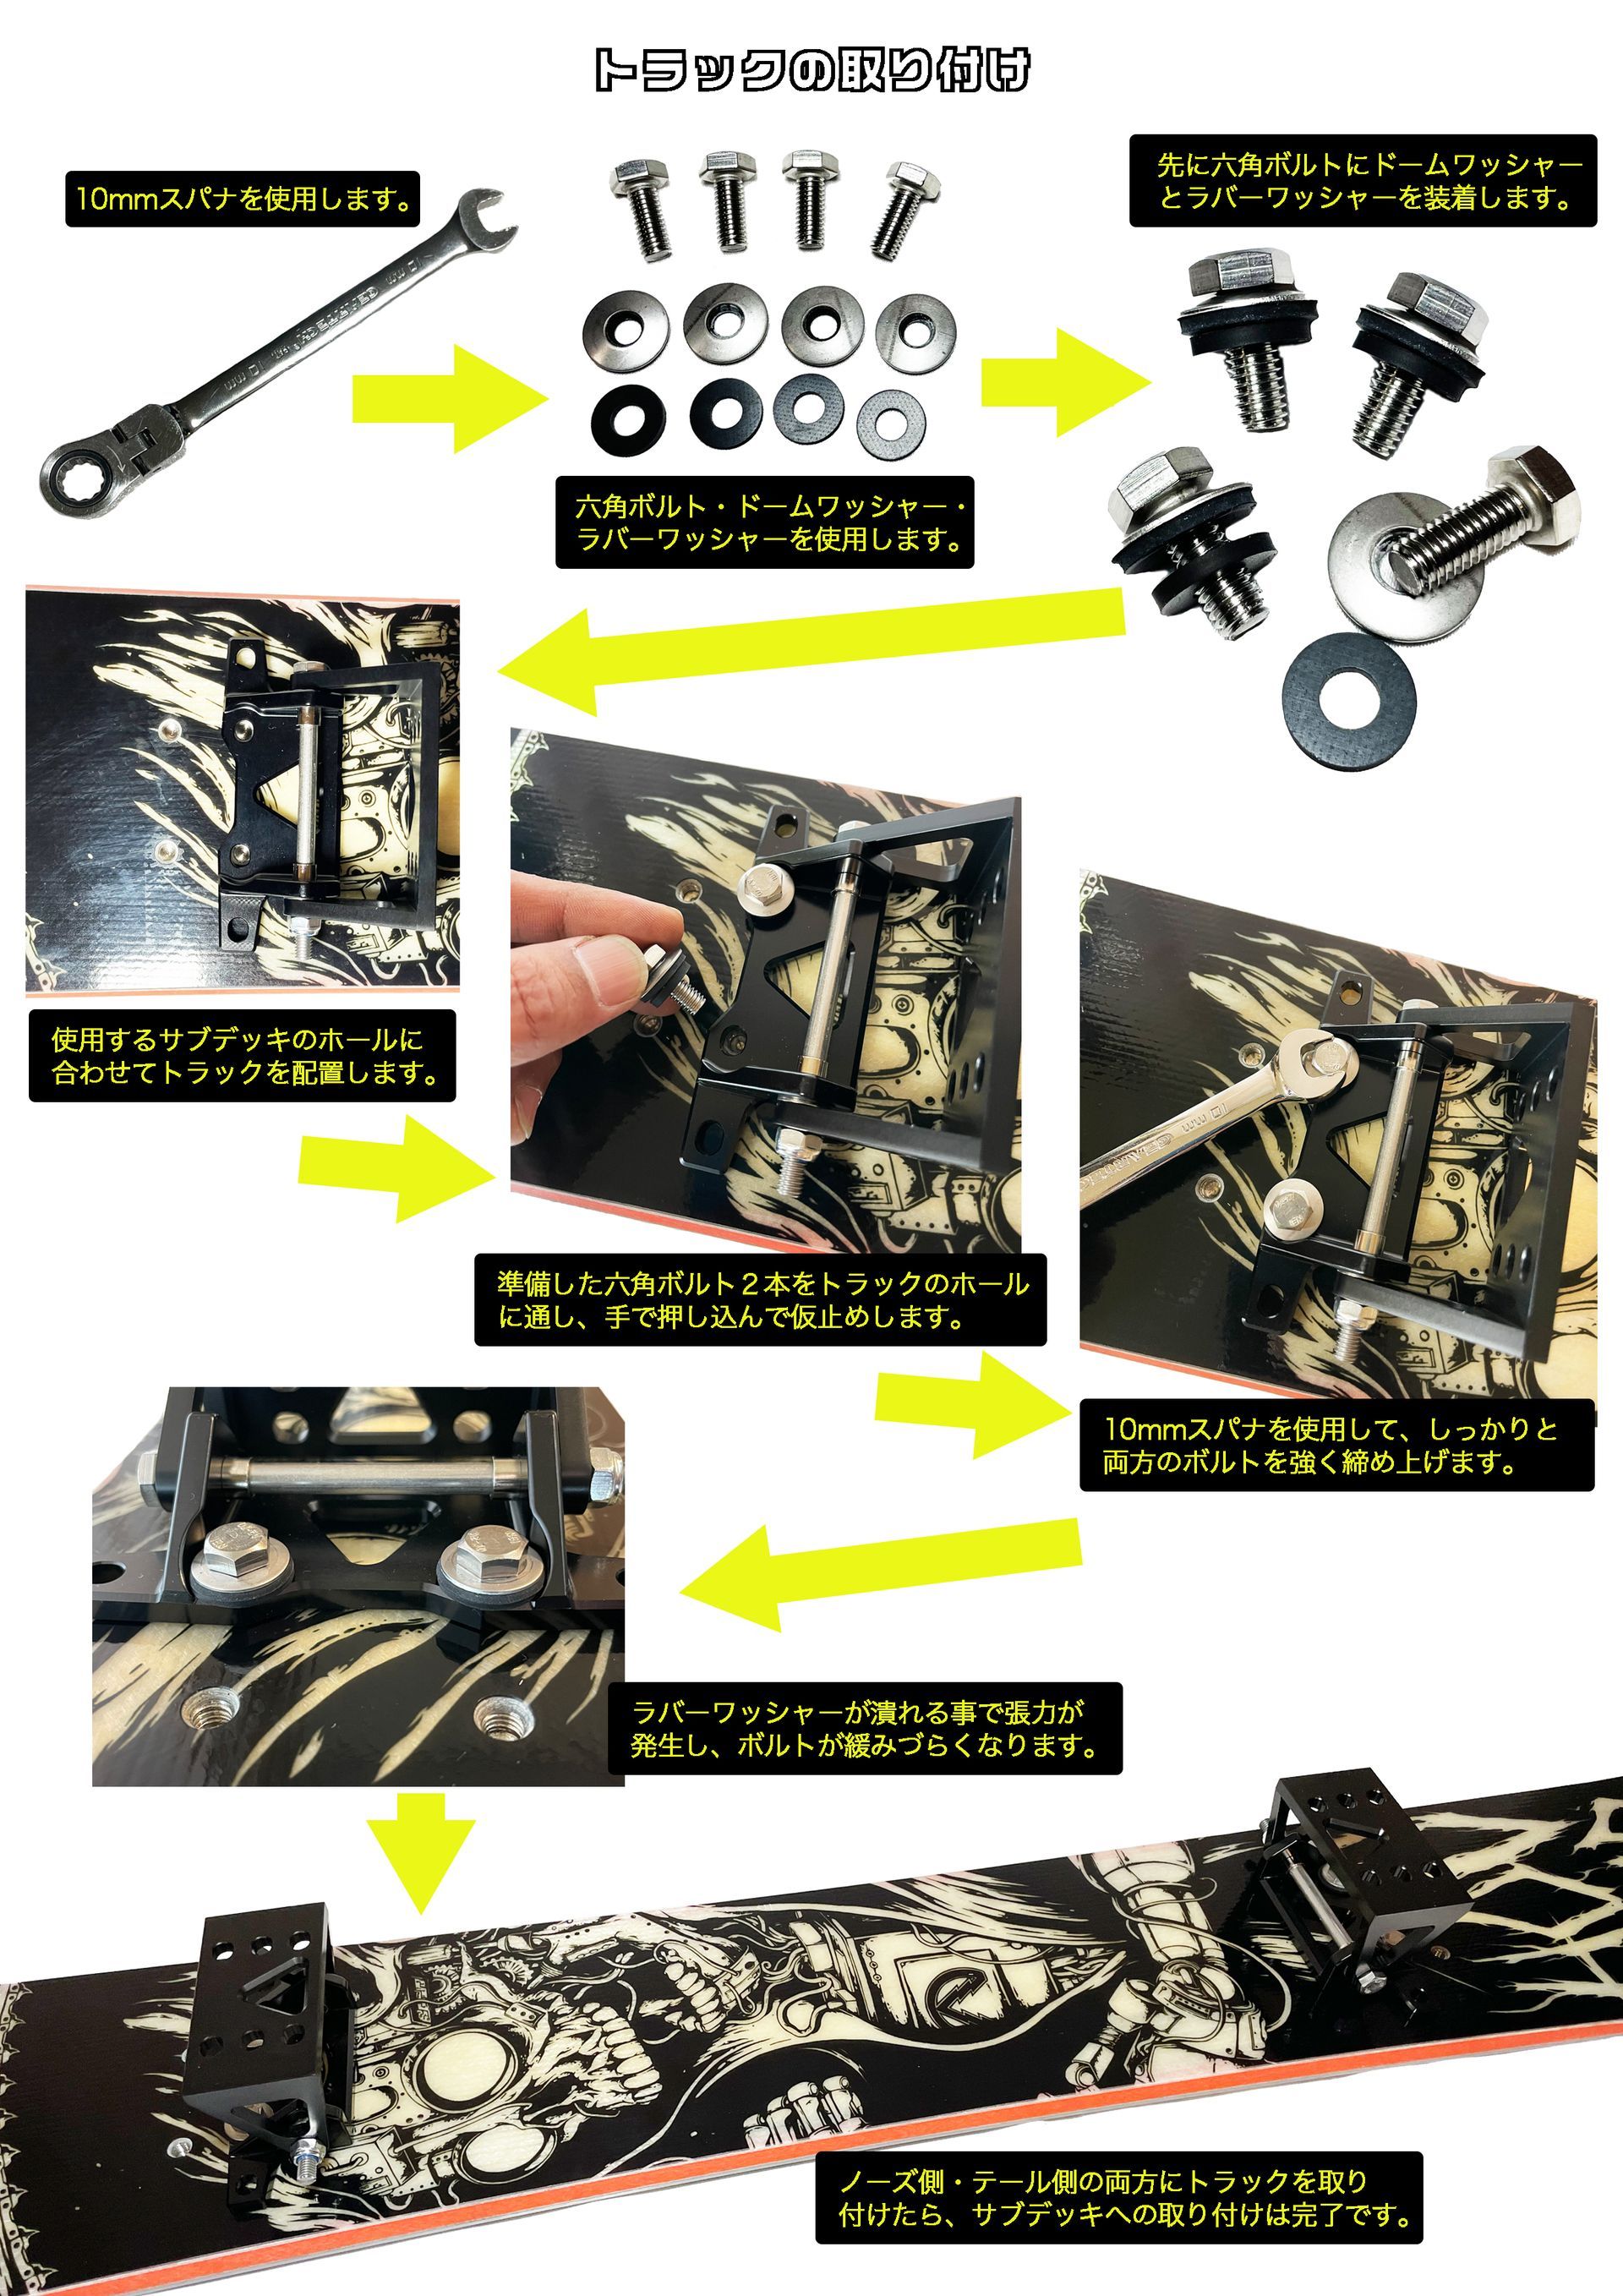
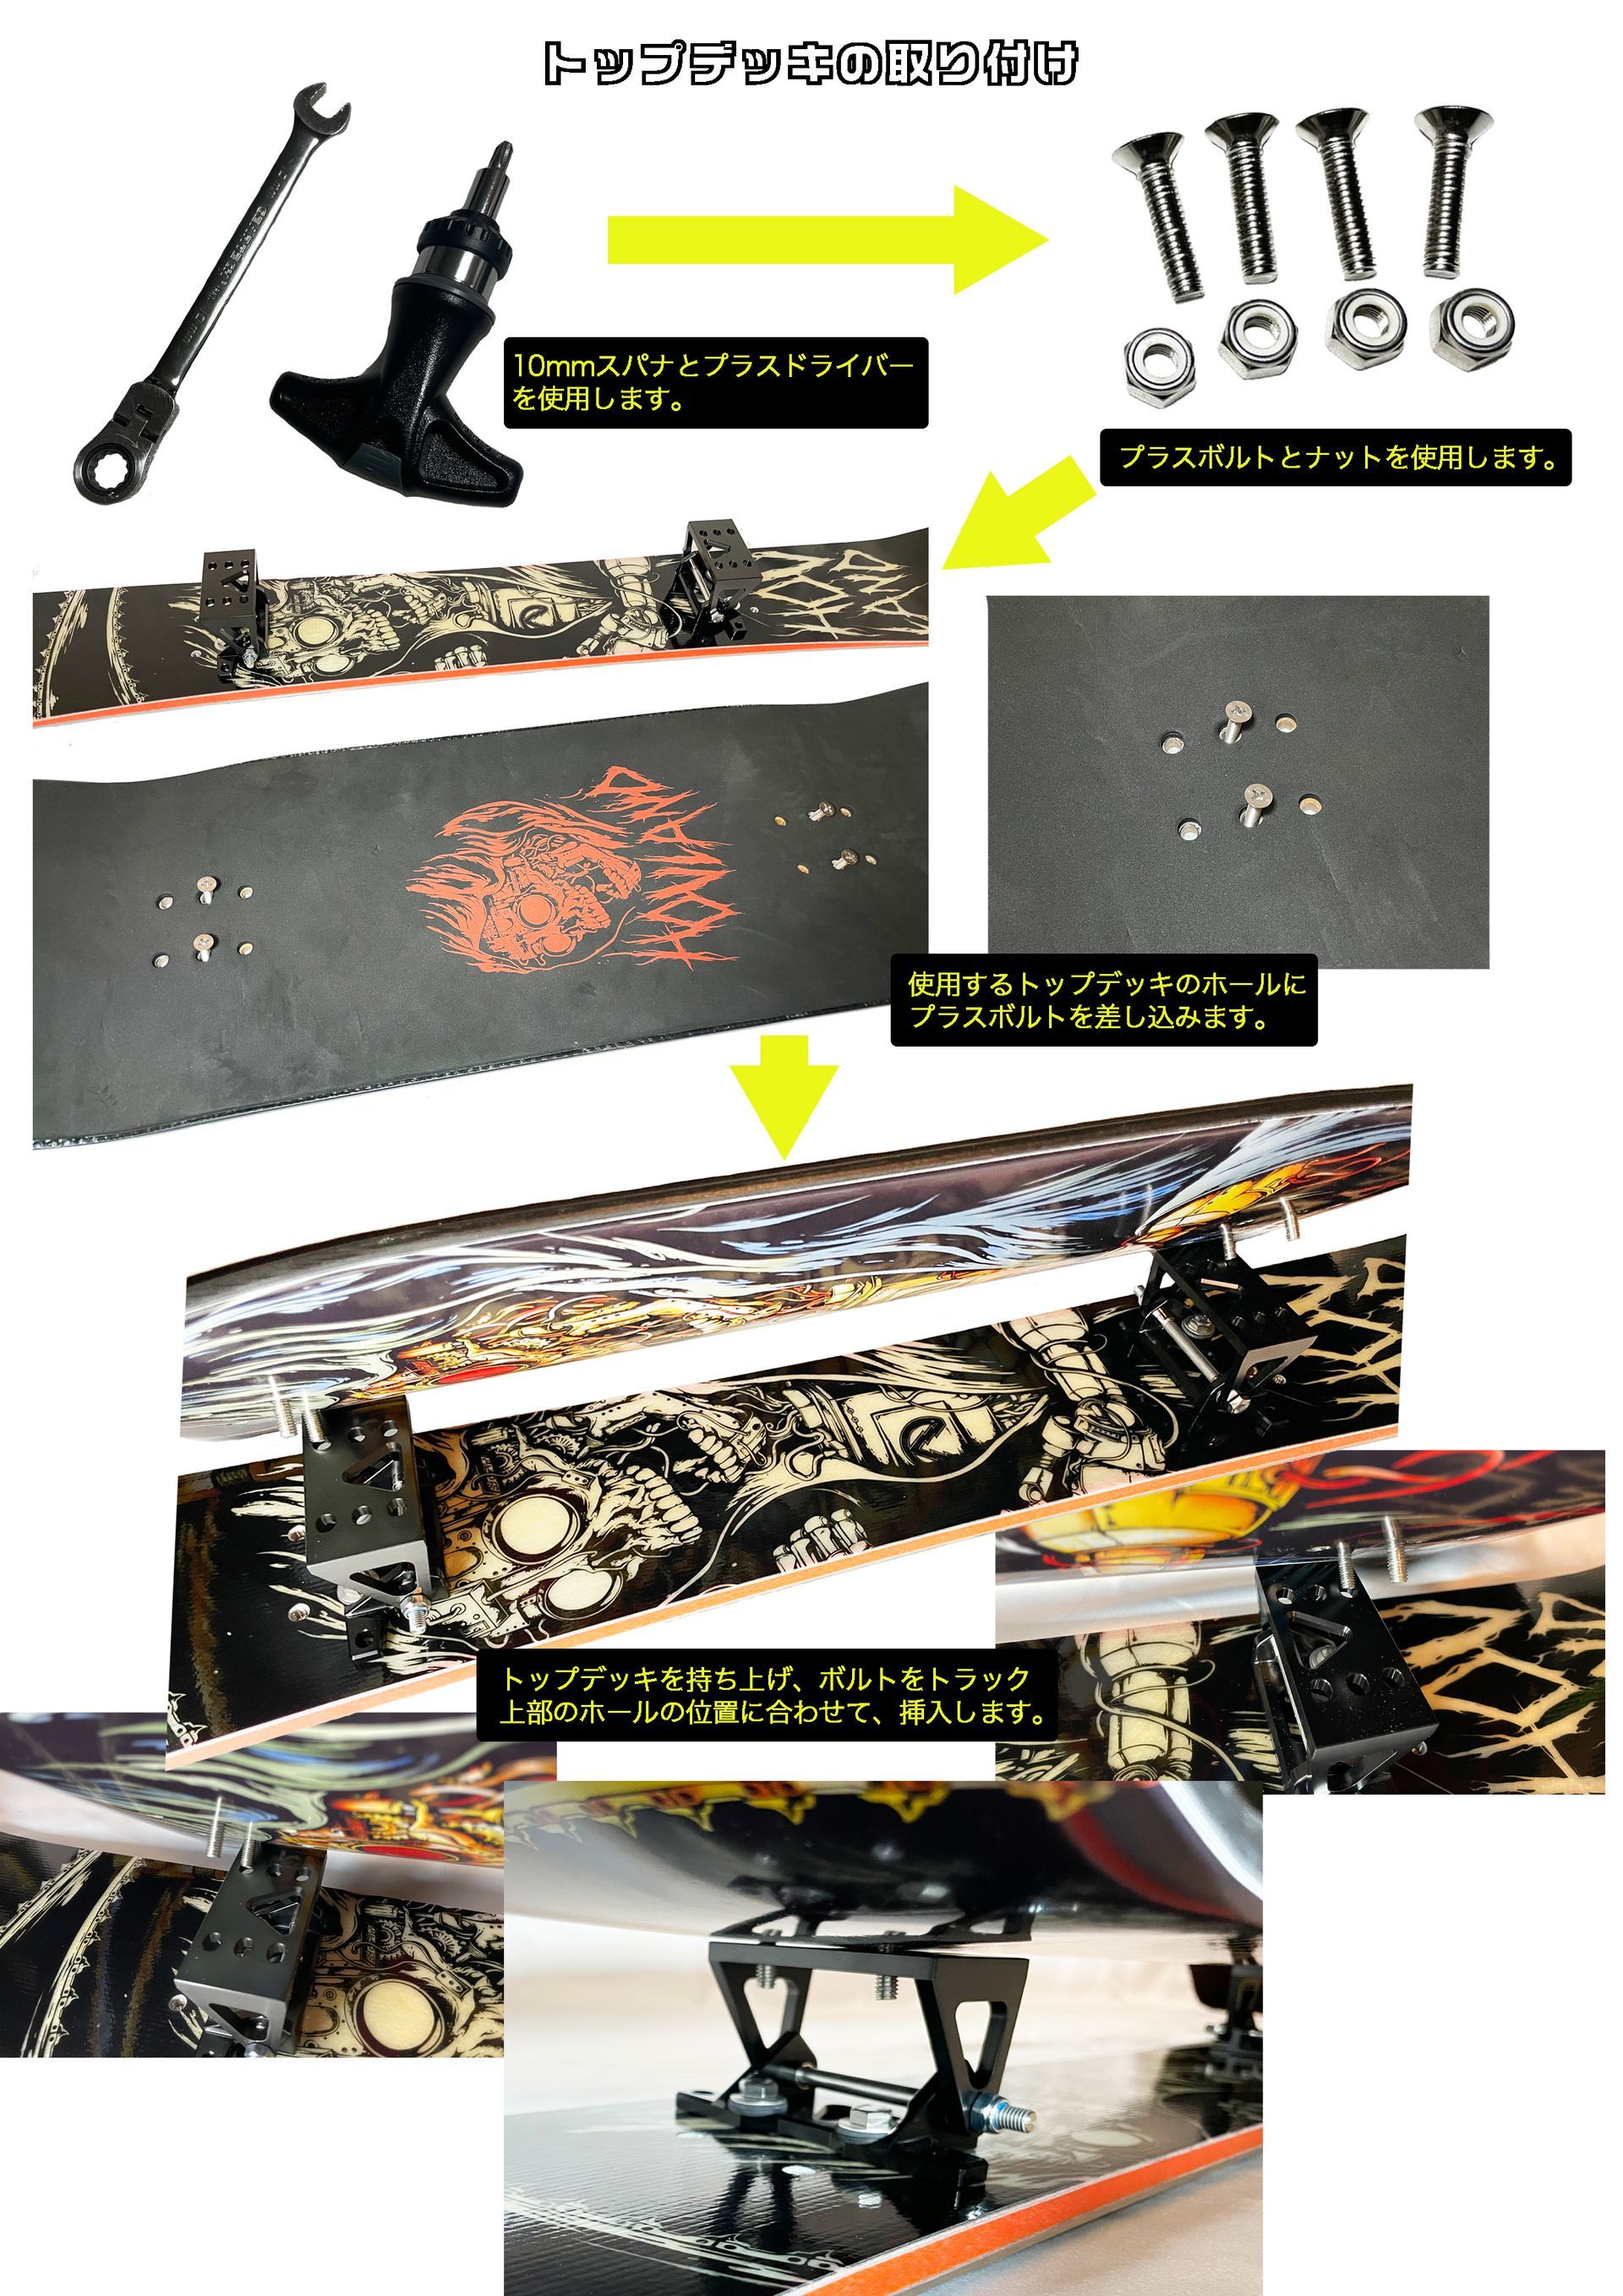
- The screws and bolts to be used are four each of hex bolts, washers, Phillips head bolts, and bolt-and-nut sets.
- The tools needed are a Phillips screwdriver and a 10mm wrench. A socket-type wrench is easier to use for hex bolts.
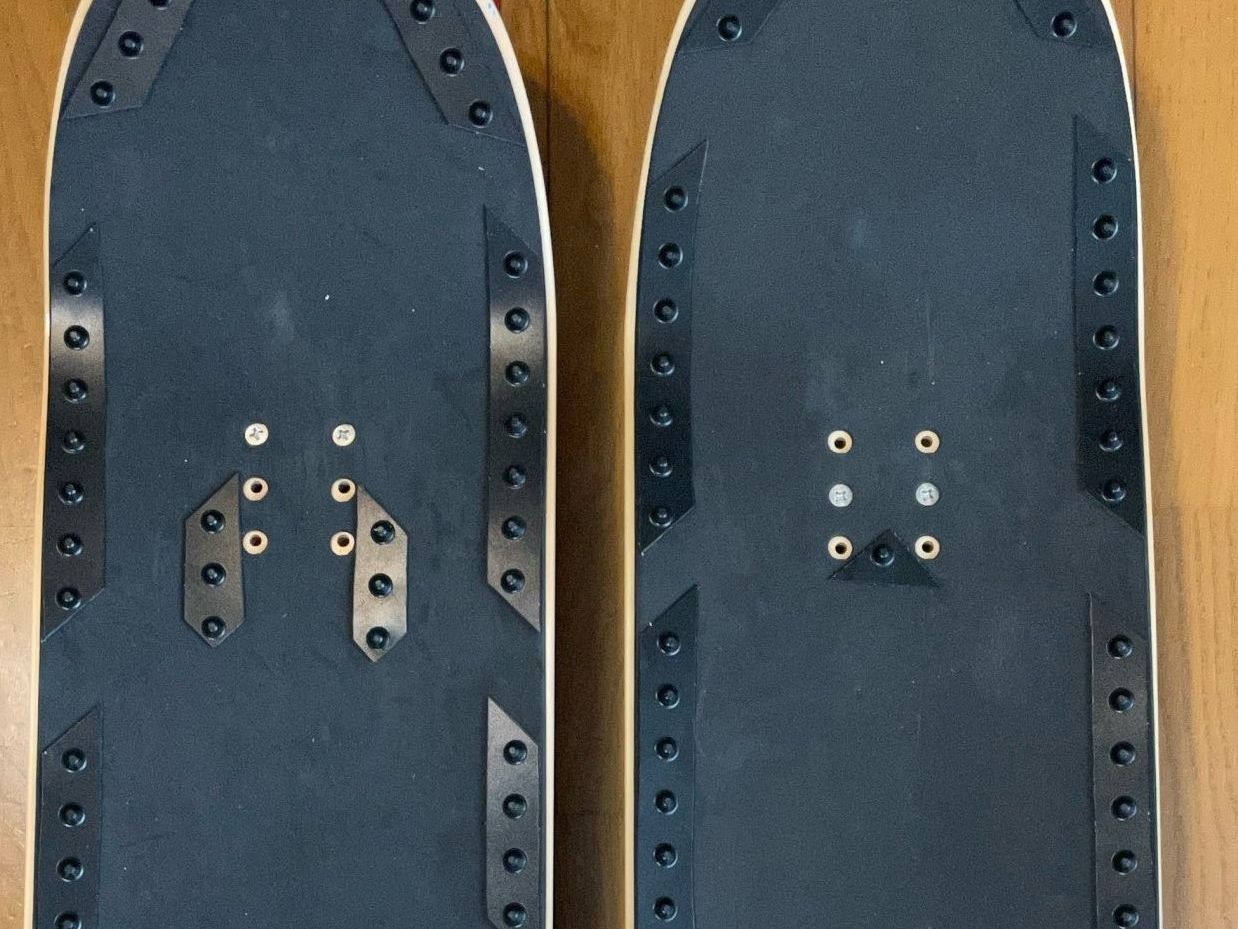
- First, attach the trucks to the sub-deck using hex bolts and washers. The center hole is the standard setting.
- Install the parts so that the sloping side of the truck faces outwards. Install them on both the nose and tail sides.
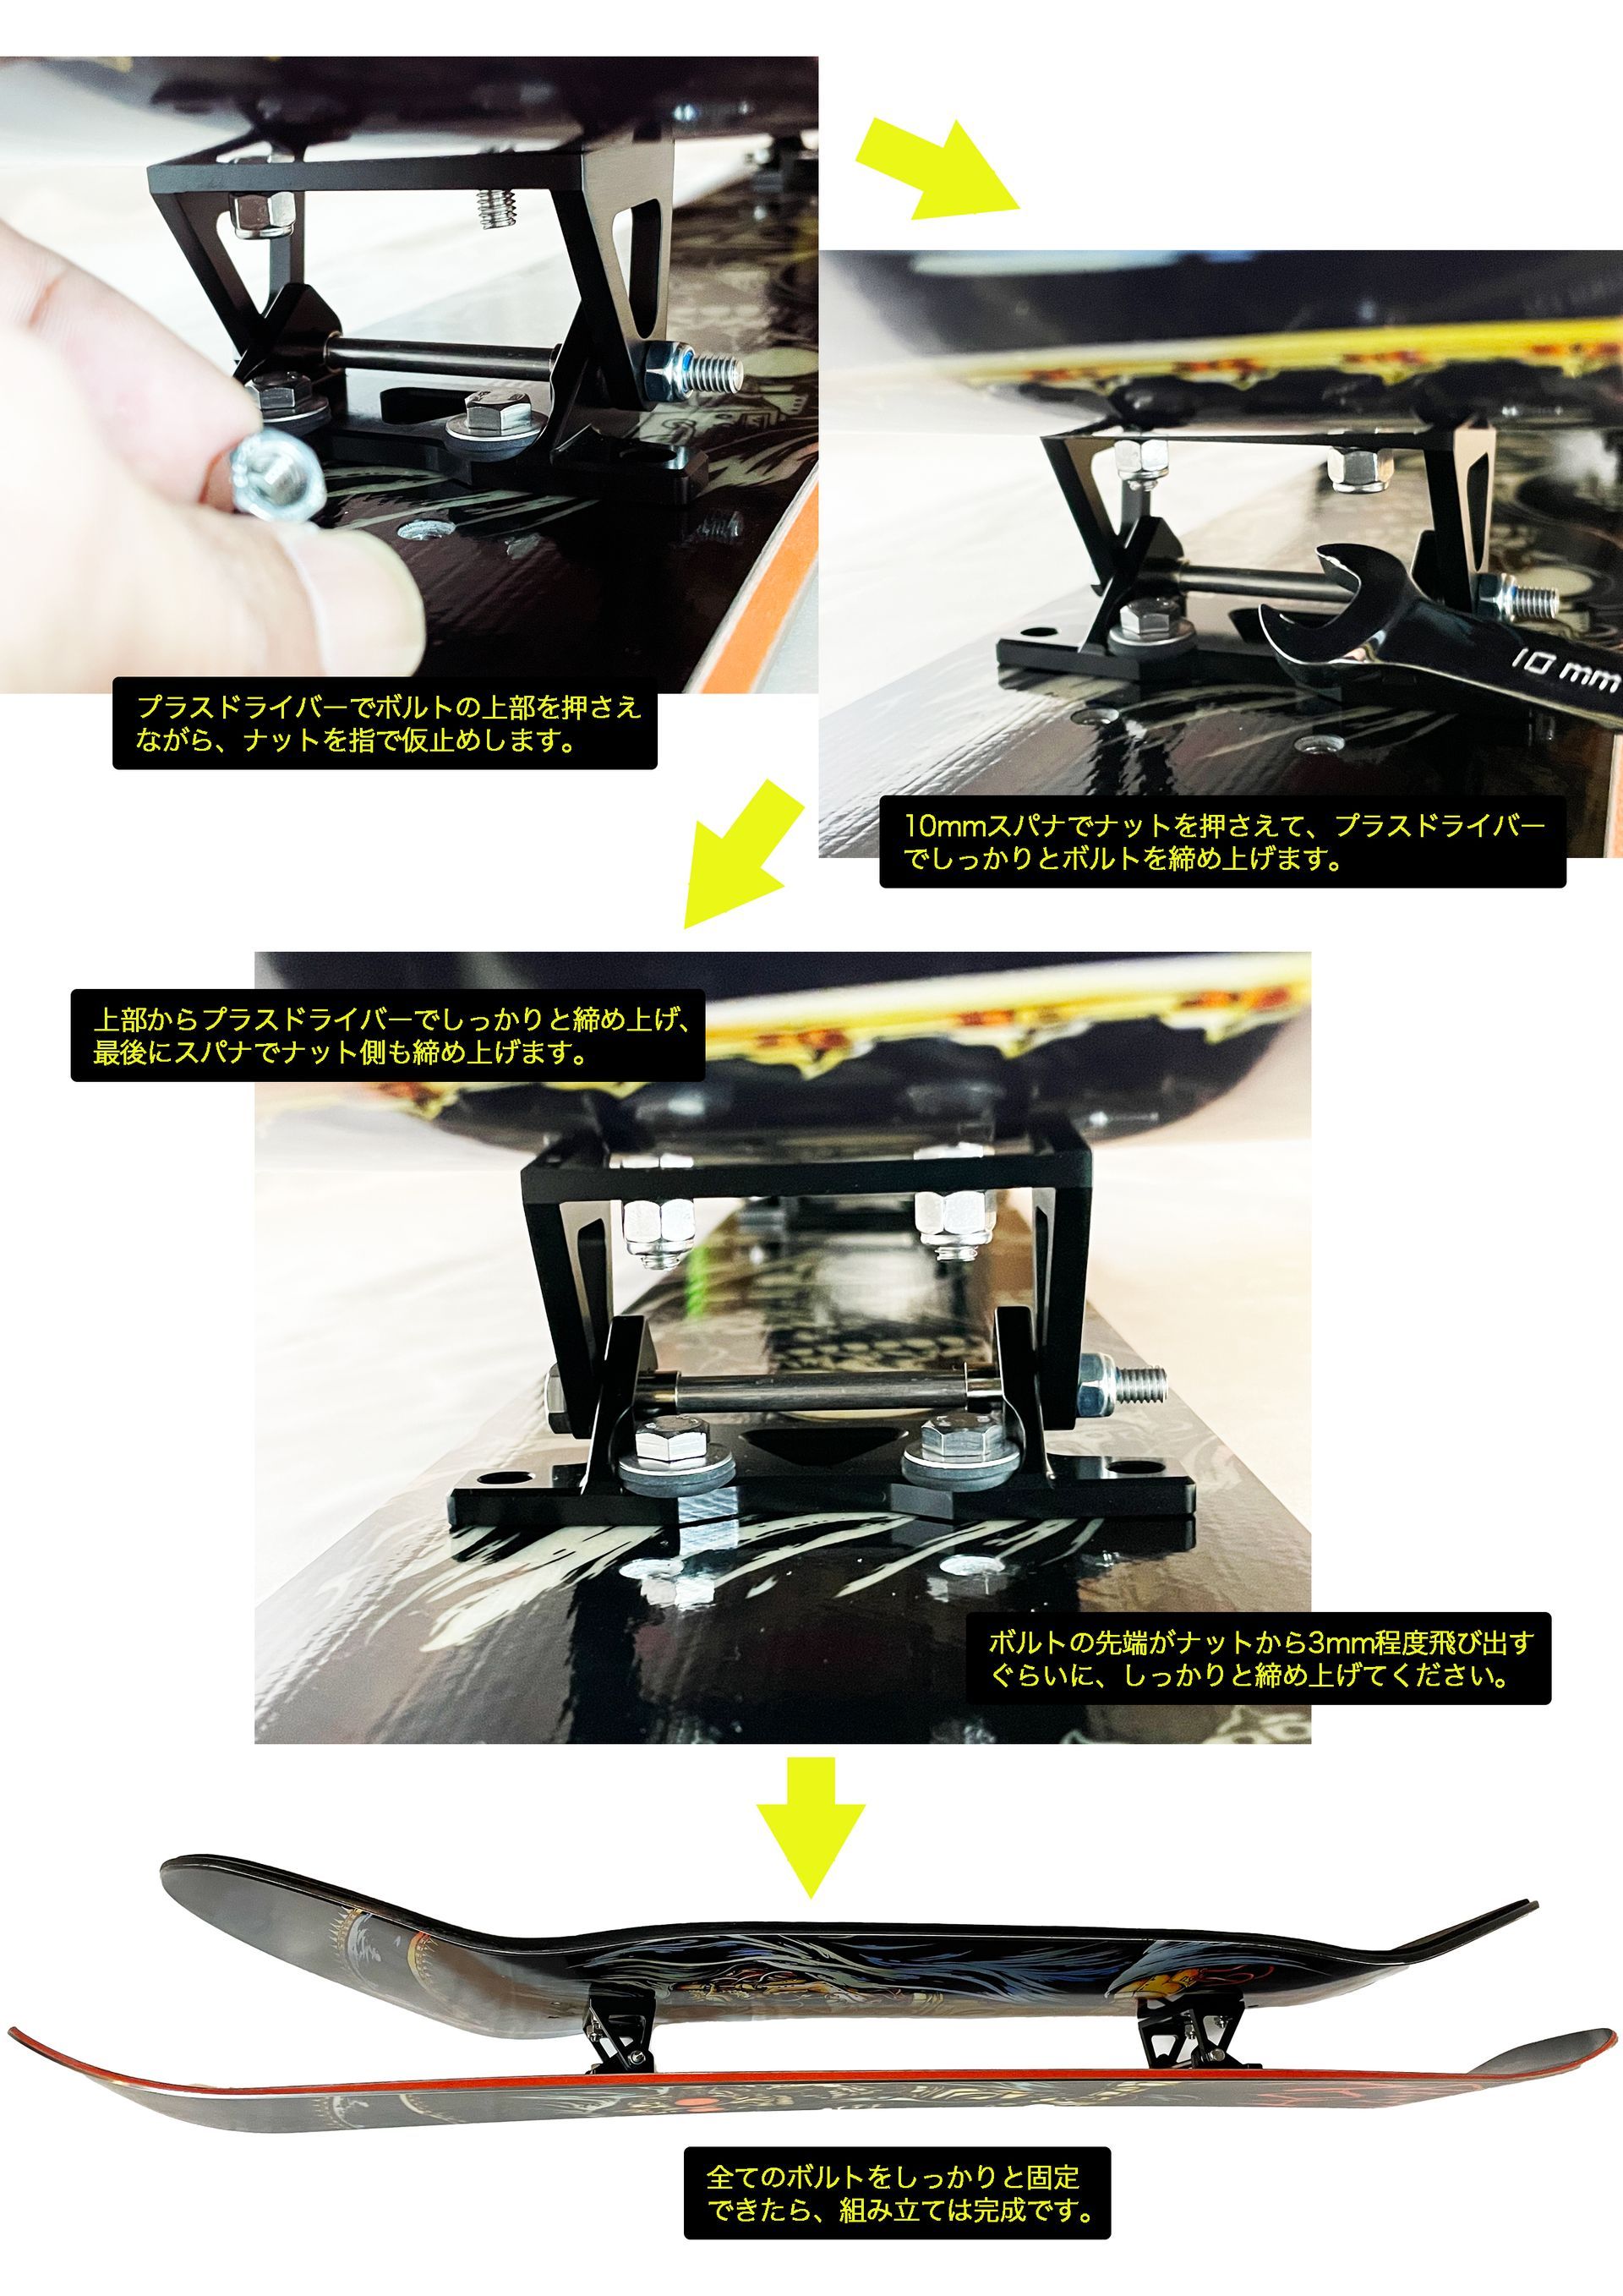
- First, pass a Phillips head bolt through the hole in the top deck, then insert the tip of the bolt into the truck hole. Finally, secure it firmly with a bolt and nut.
- Once you've tightened all the bolts securely again, the assembly is complete.
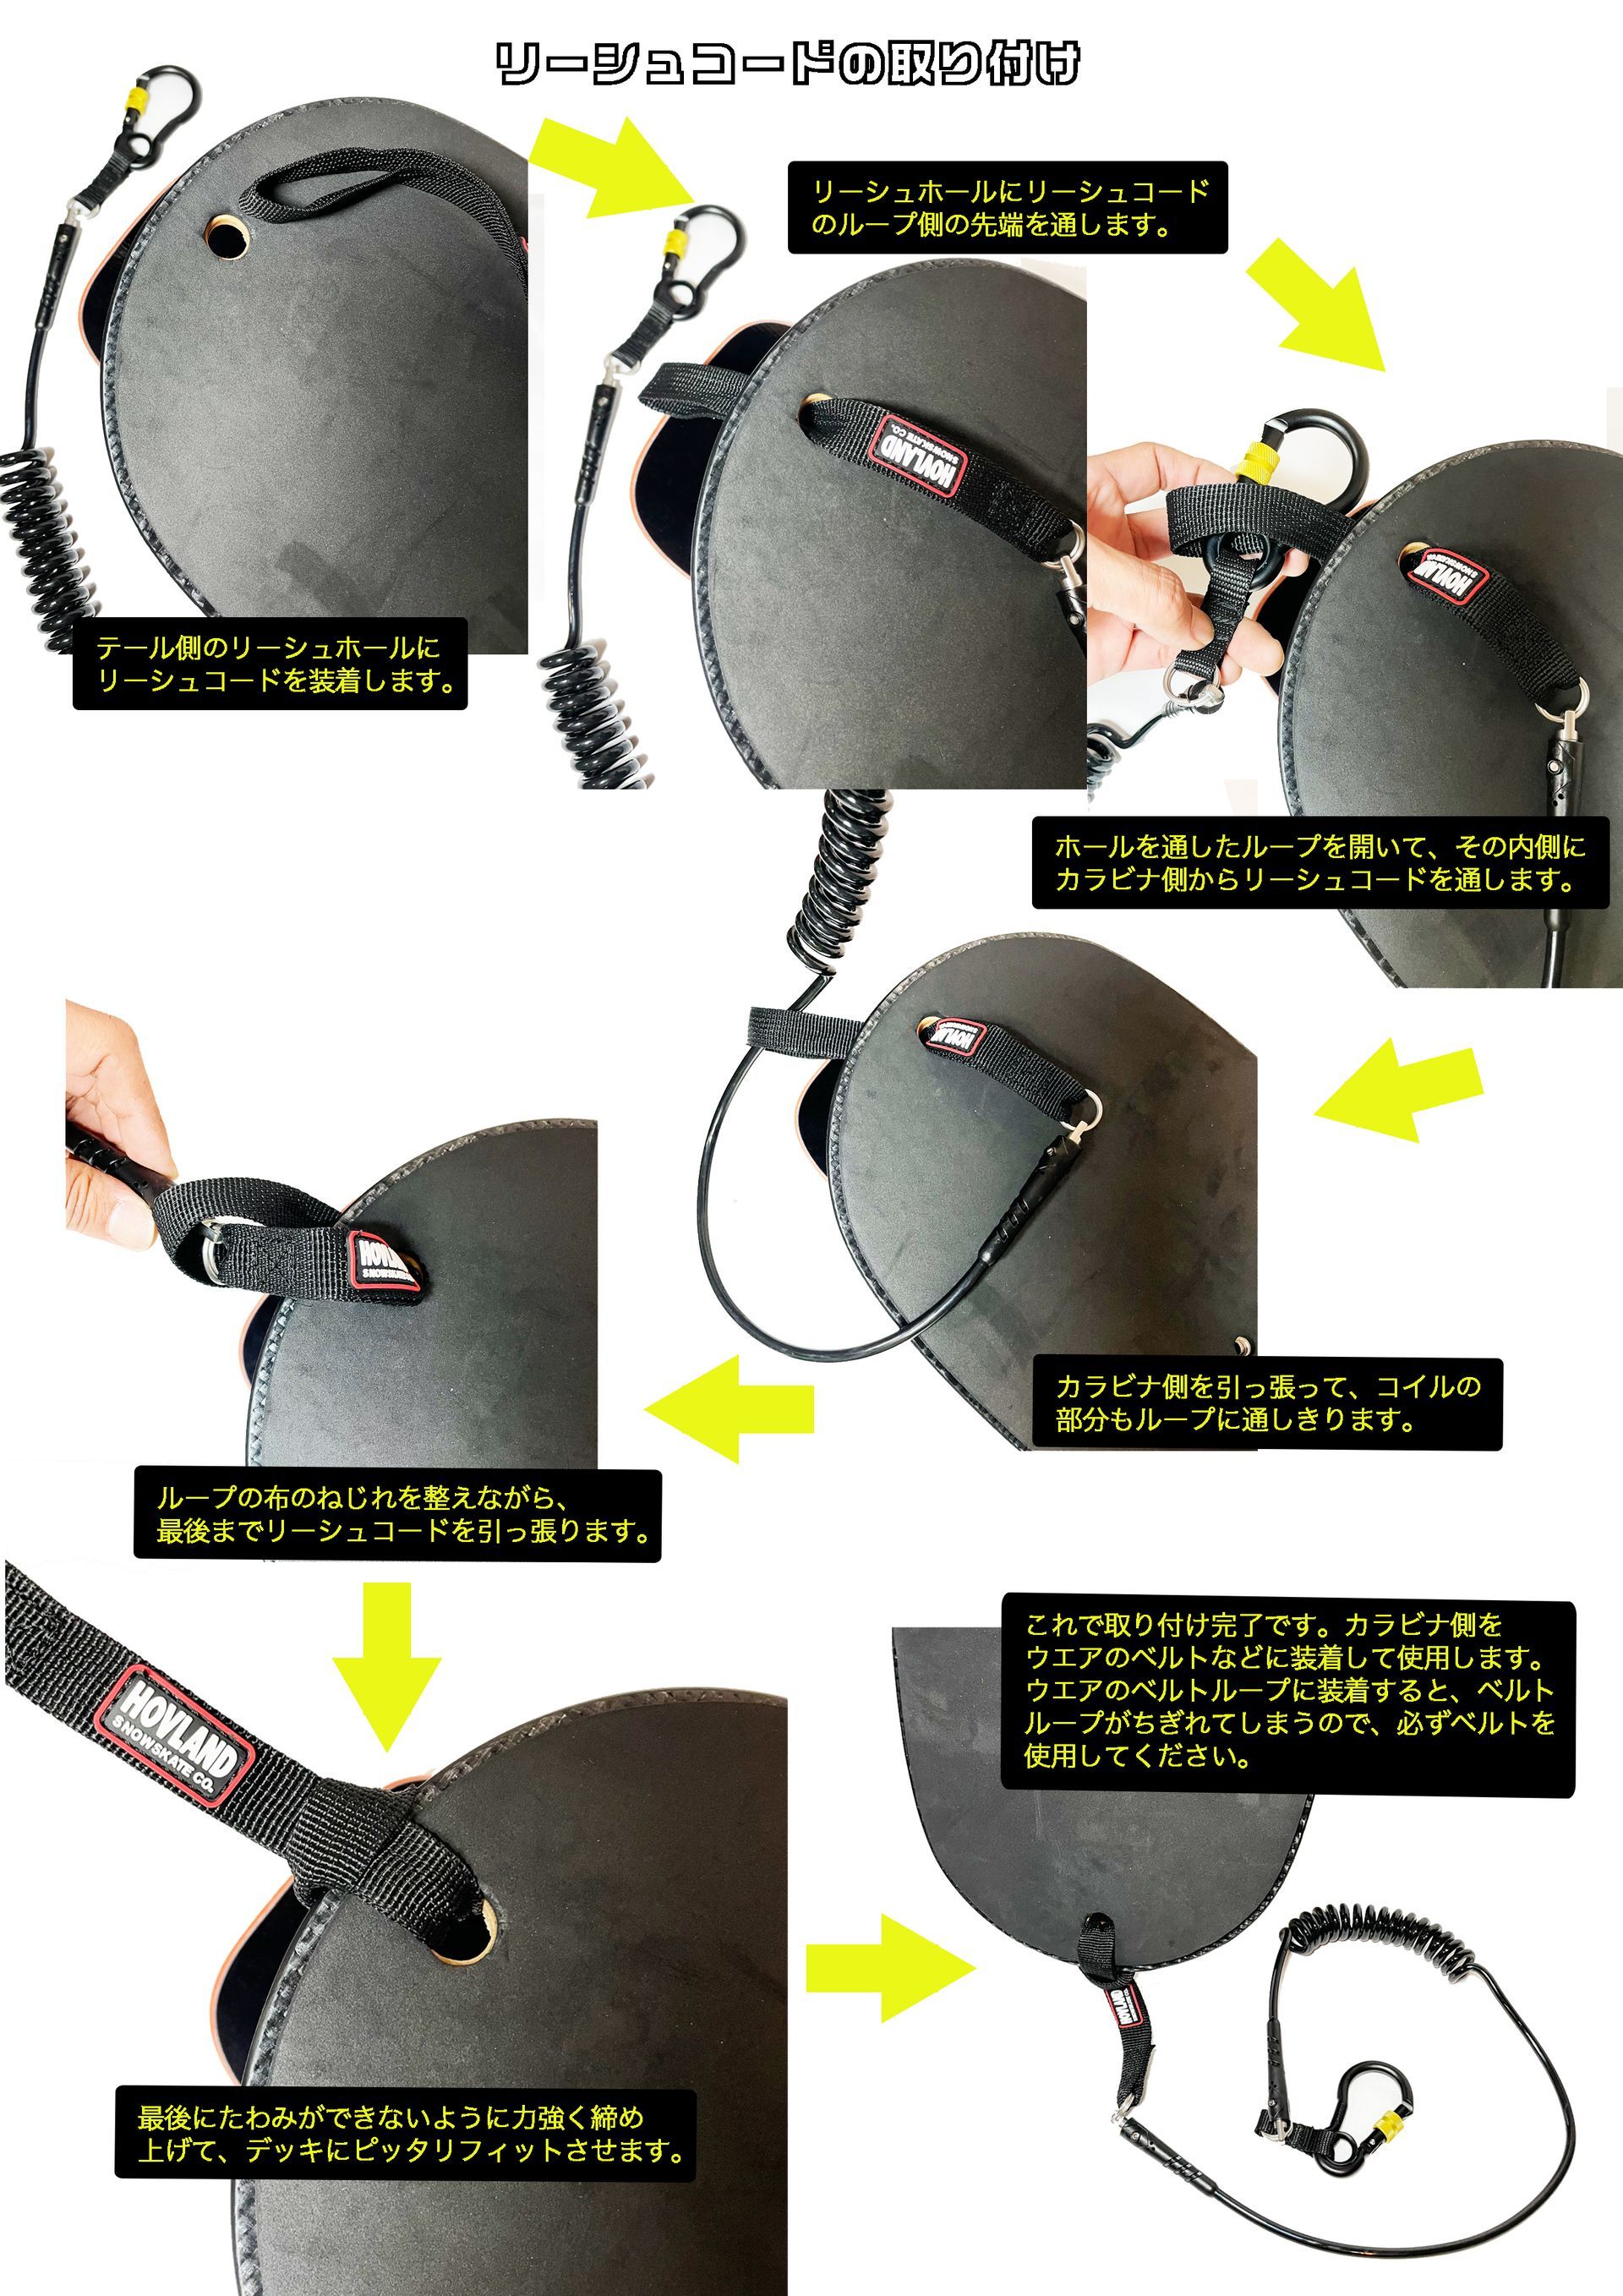
- Finally, thread the leash through the leash hole.
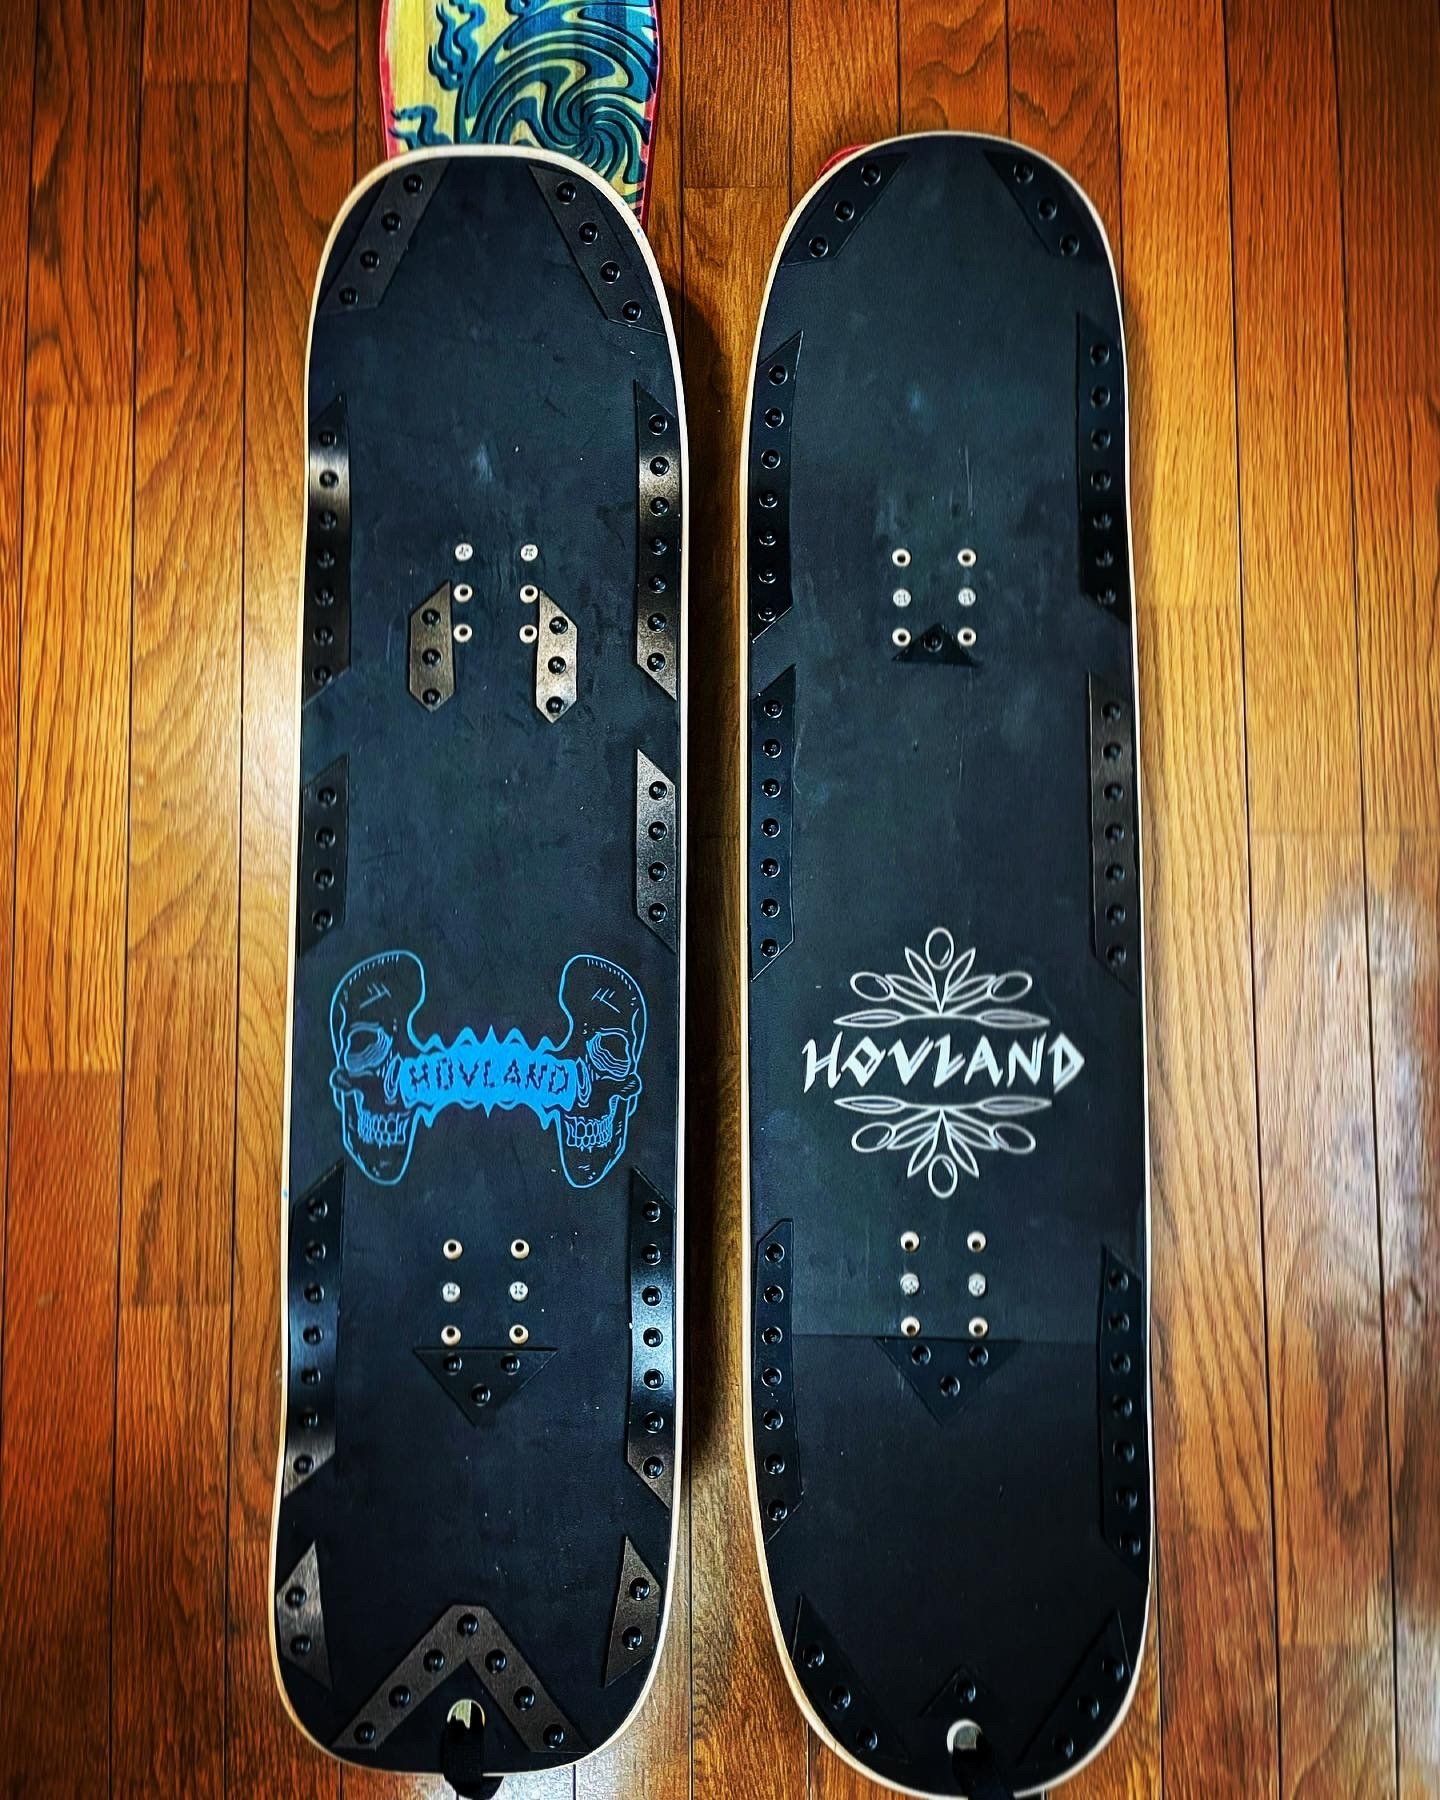
How to set up a snowskate
The following are places where you can customize your snowskate settings:
You can then customize these points to create your own unique setup.
- Subdeck Hole
Truck height
It's best to start with the standard settings and then adjust them based on your riding feel if there are any aspects you want to customize.
Subdeck Hall
Connecting the tracks to the central hall is the standard setup.
Install the trucks at intervals that do not exceed the longest hole width on the top deck.
Nose side hole
To soften the nose flex, connect the truck one notch towards the tail.
To make the nose flex stiffer, connect the truck one notch closer to the nose.
Tail side hole
To soften the tail's flex, connect the truck one notch closer to the nose.
To stiffen the tail flex, connect the truck one notch closer to the tail.
Top deck hole
Connecting the tracks to the central hall is the standard setup.
The hole positions used on the top deck depend on the truck mounting positions, so you should basically mount them according to the truck positions.
Nose side hole
To delay the response when pressing the nose, connect the truck one notch towards the tail.
To make the response to pressing the nose faster, connect the truck one notch closer to the nose.
Tail side hole
To delay the response when pressing the tail, connect the truck one notch closer to the nose.
To make the tail response faster, connect the truck one notch closer to the tail.
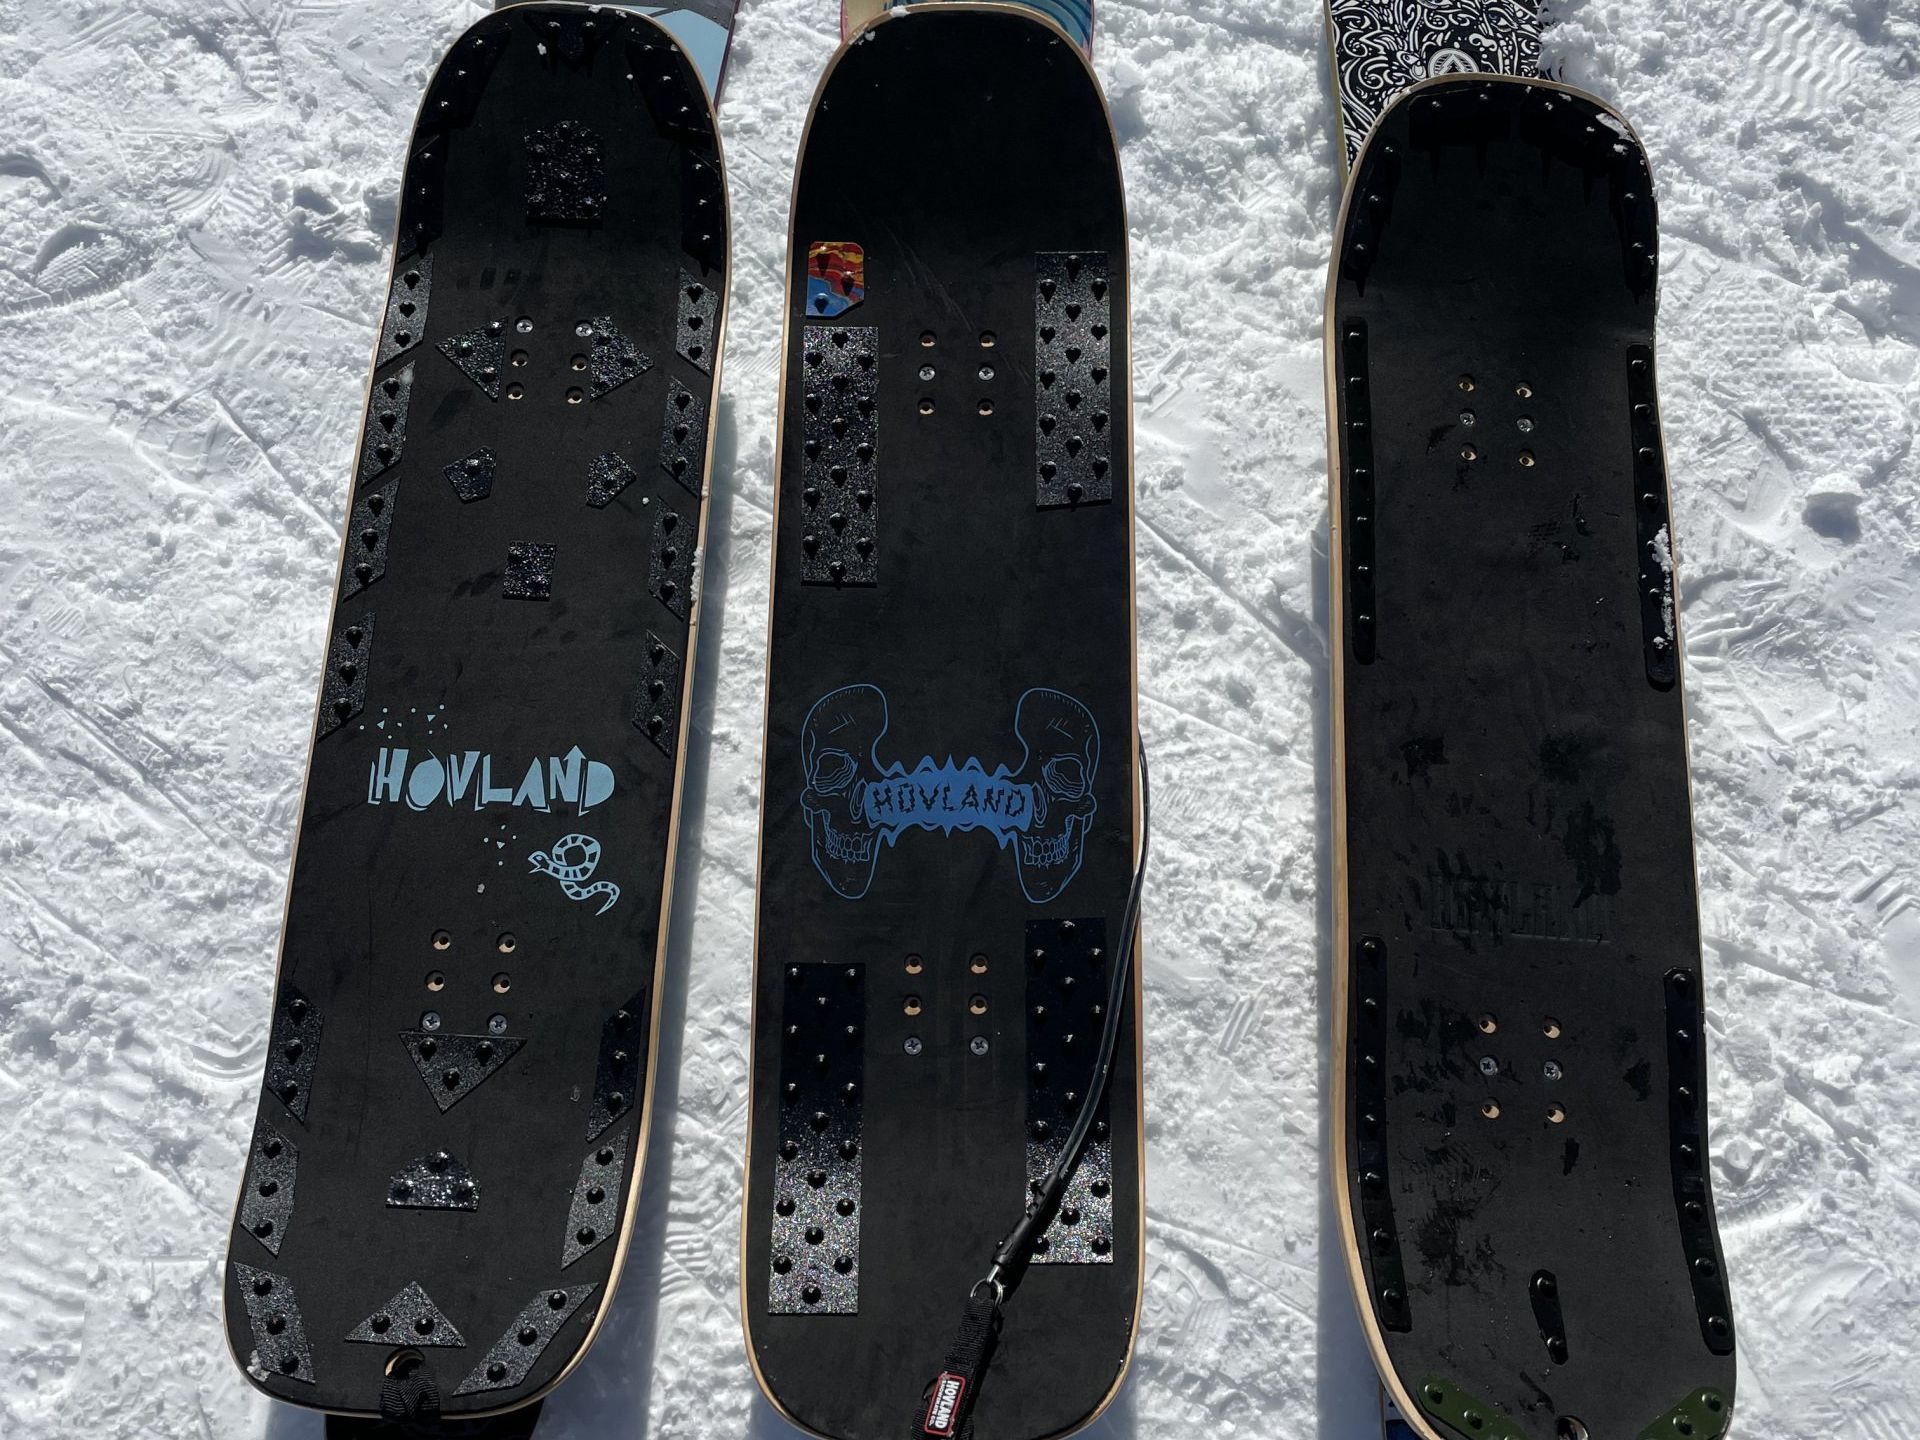
Top deck size
All models are developed with the standard size as the base, based on the shape of the sub-deck.
However, Hovland offers multiple sizes to accommodate users' physical characteristics such as height, weight, and shoe size, as well as for customizing their snowskates.
The most important factor when choosing a top deck size is how well it fits your body.
If your goal is customization, you can make slight changes to the weight, response speed, and other aspects.
Large size top deck
It offers stability for high-speed riding and powder riding.
The longer the sub-deck, the more effective it is.
The larger surface area results in a softer response from the deck.
Small size top deck
This is a good fit for people with smaller bodies or feet.
Its lightweight design makes it effective for skateboarding tricks.
Because the surface area is smaller, the deck's response becomes stiffer.
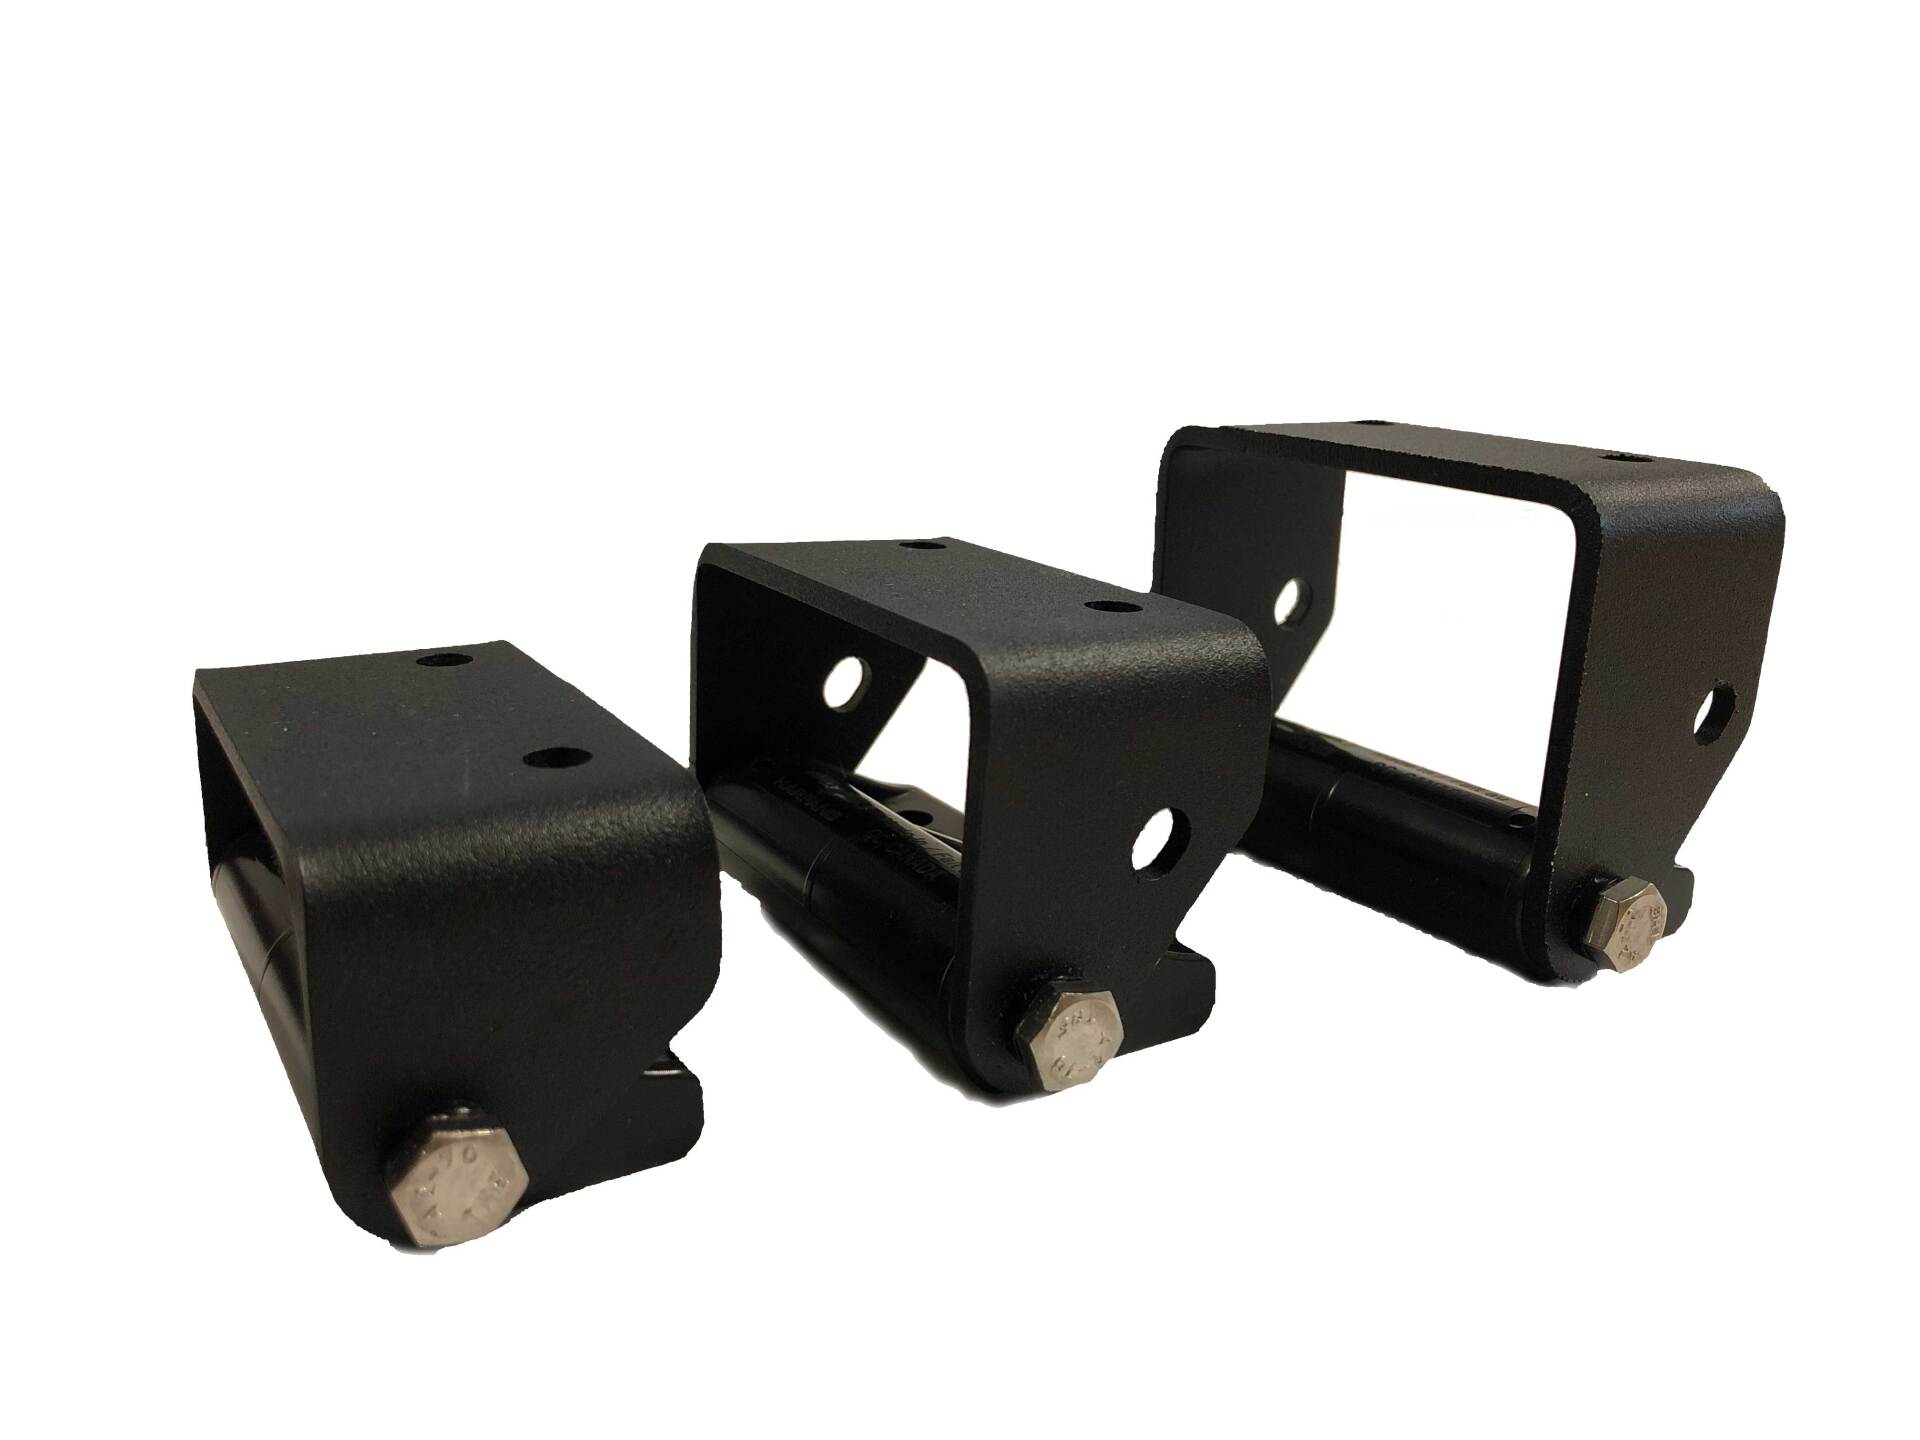
Truck height
The standard size is defined as the standard height, but opinions differ even within Hovland regarding this.
The tall size might be more beginner-friendly.
If you're unsure, I recommend installing risers on your trucks and adjusting them.
Tall truck
The edging response becomes faster, and the rotational movement of the subdeck becomes lighter.
This improves control during free run.
The longer the sub-deck, the more effective it is.
Low truck
The edging response becomes slower, and foot positioning for tricks becomes more stable.
This increases stability on the rail box.
Models with shorter sub-decks are more effective.
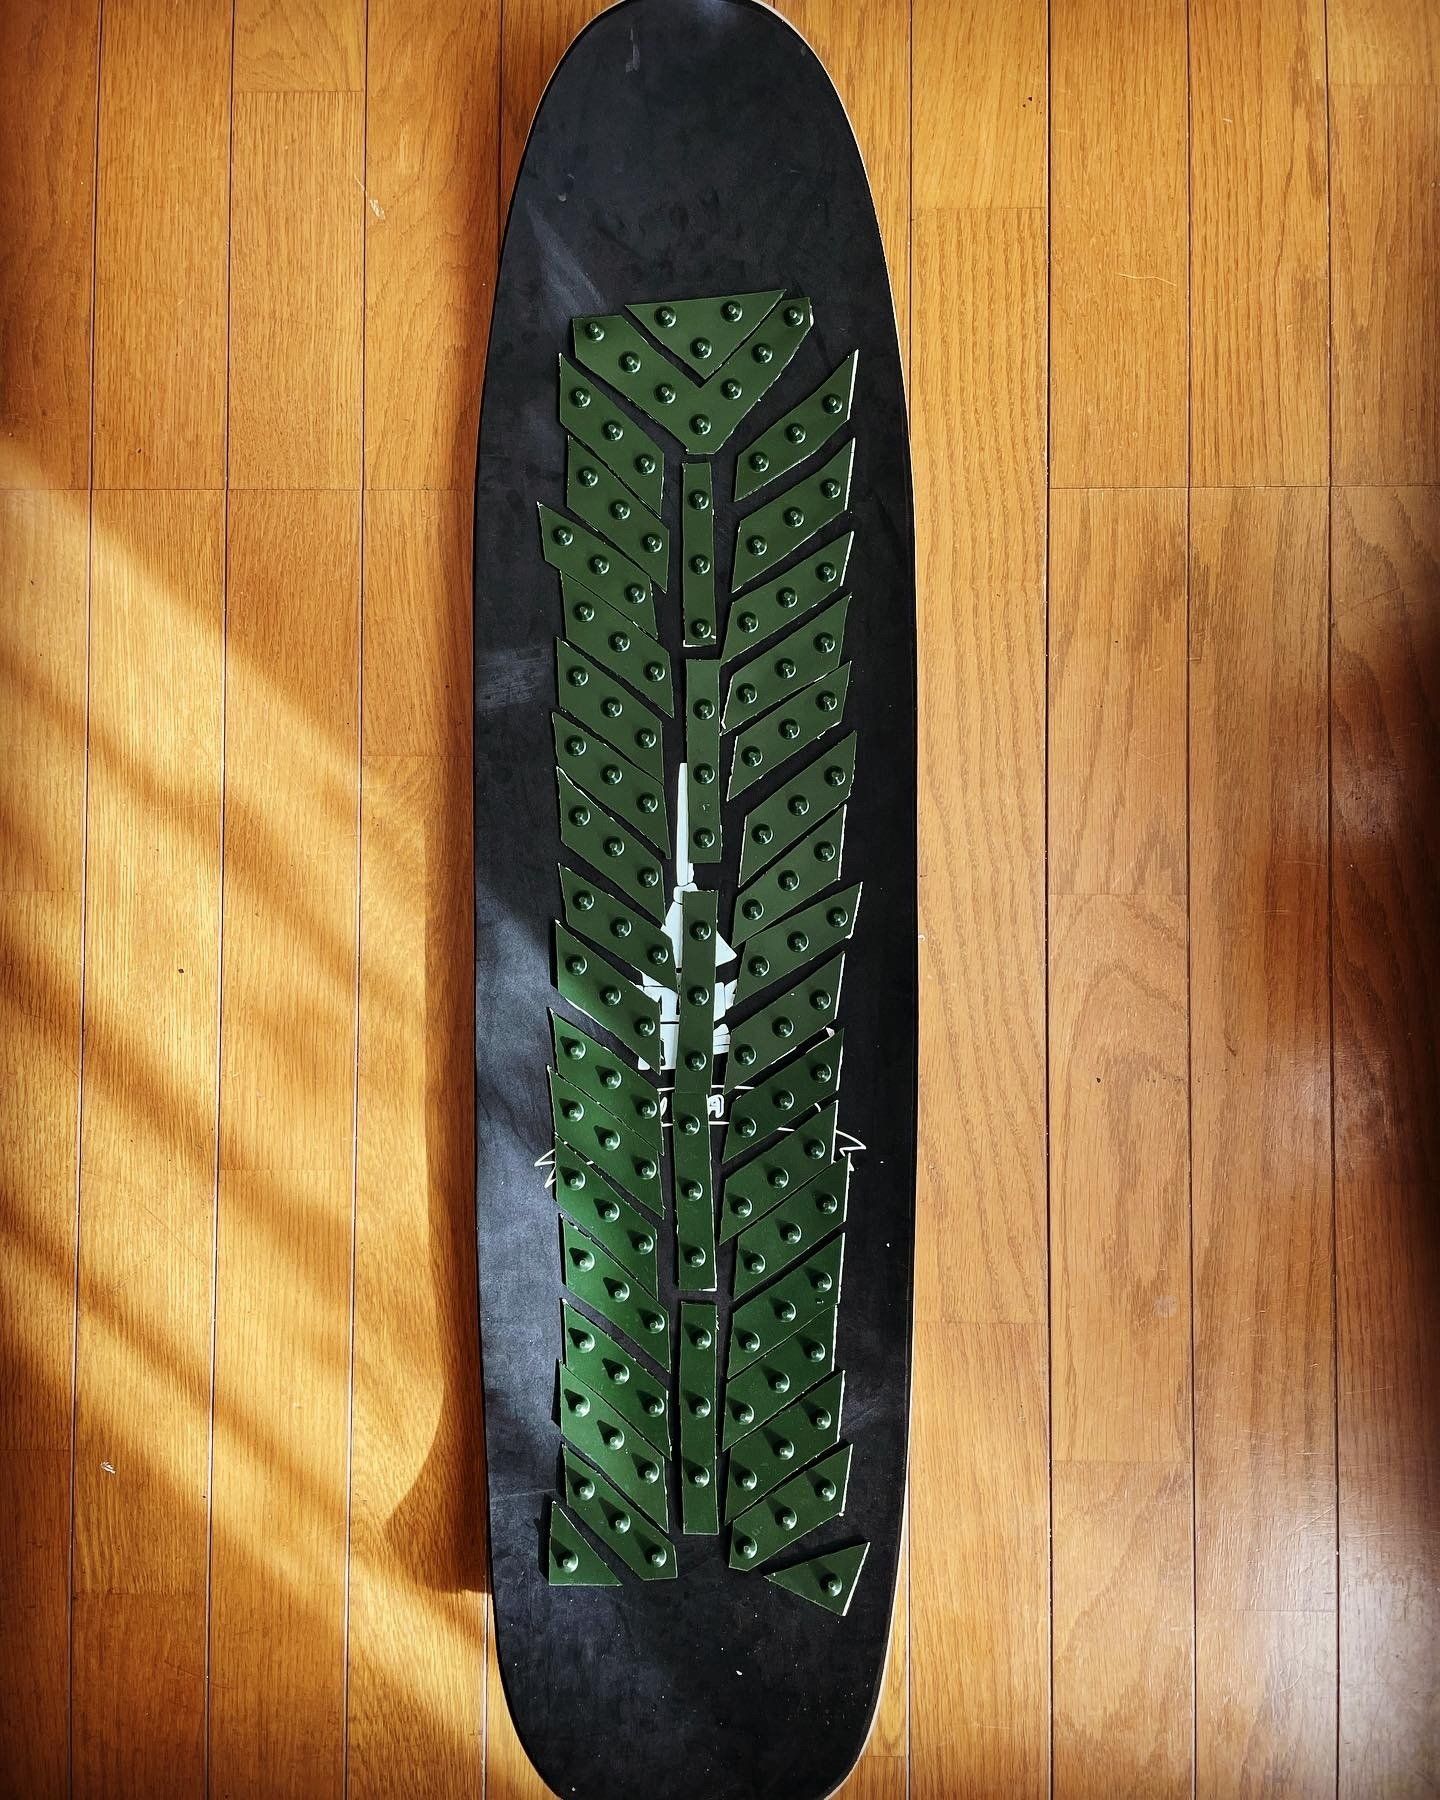
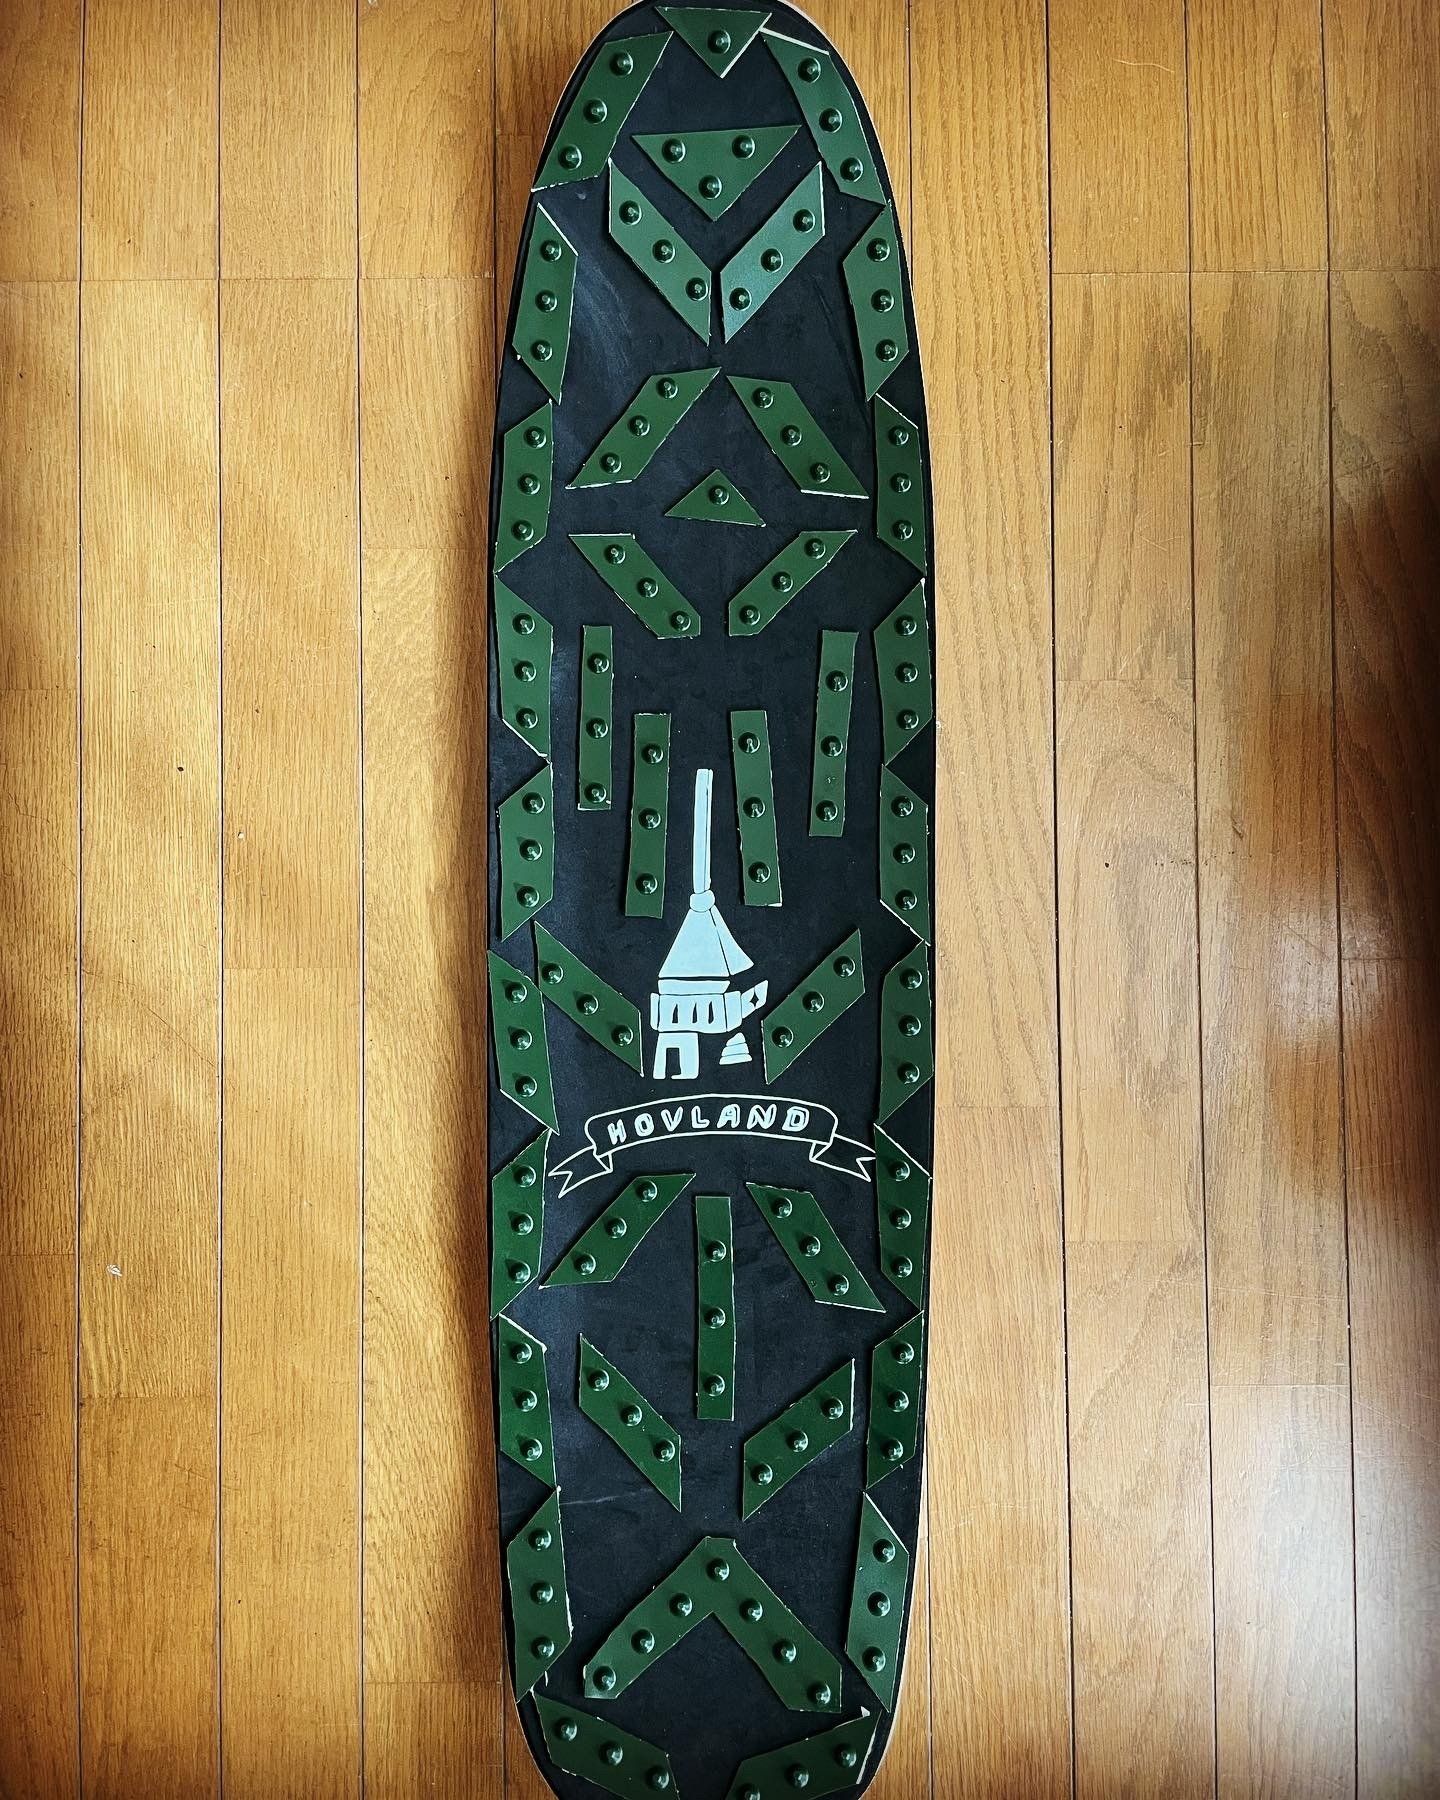
Grip tape
This is an example of how to apply "GripAll" grip tape, which has anti-slip spike-like studs.
Cutting them to the appropriate size with scissors allows for more effective placement.
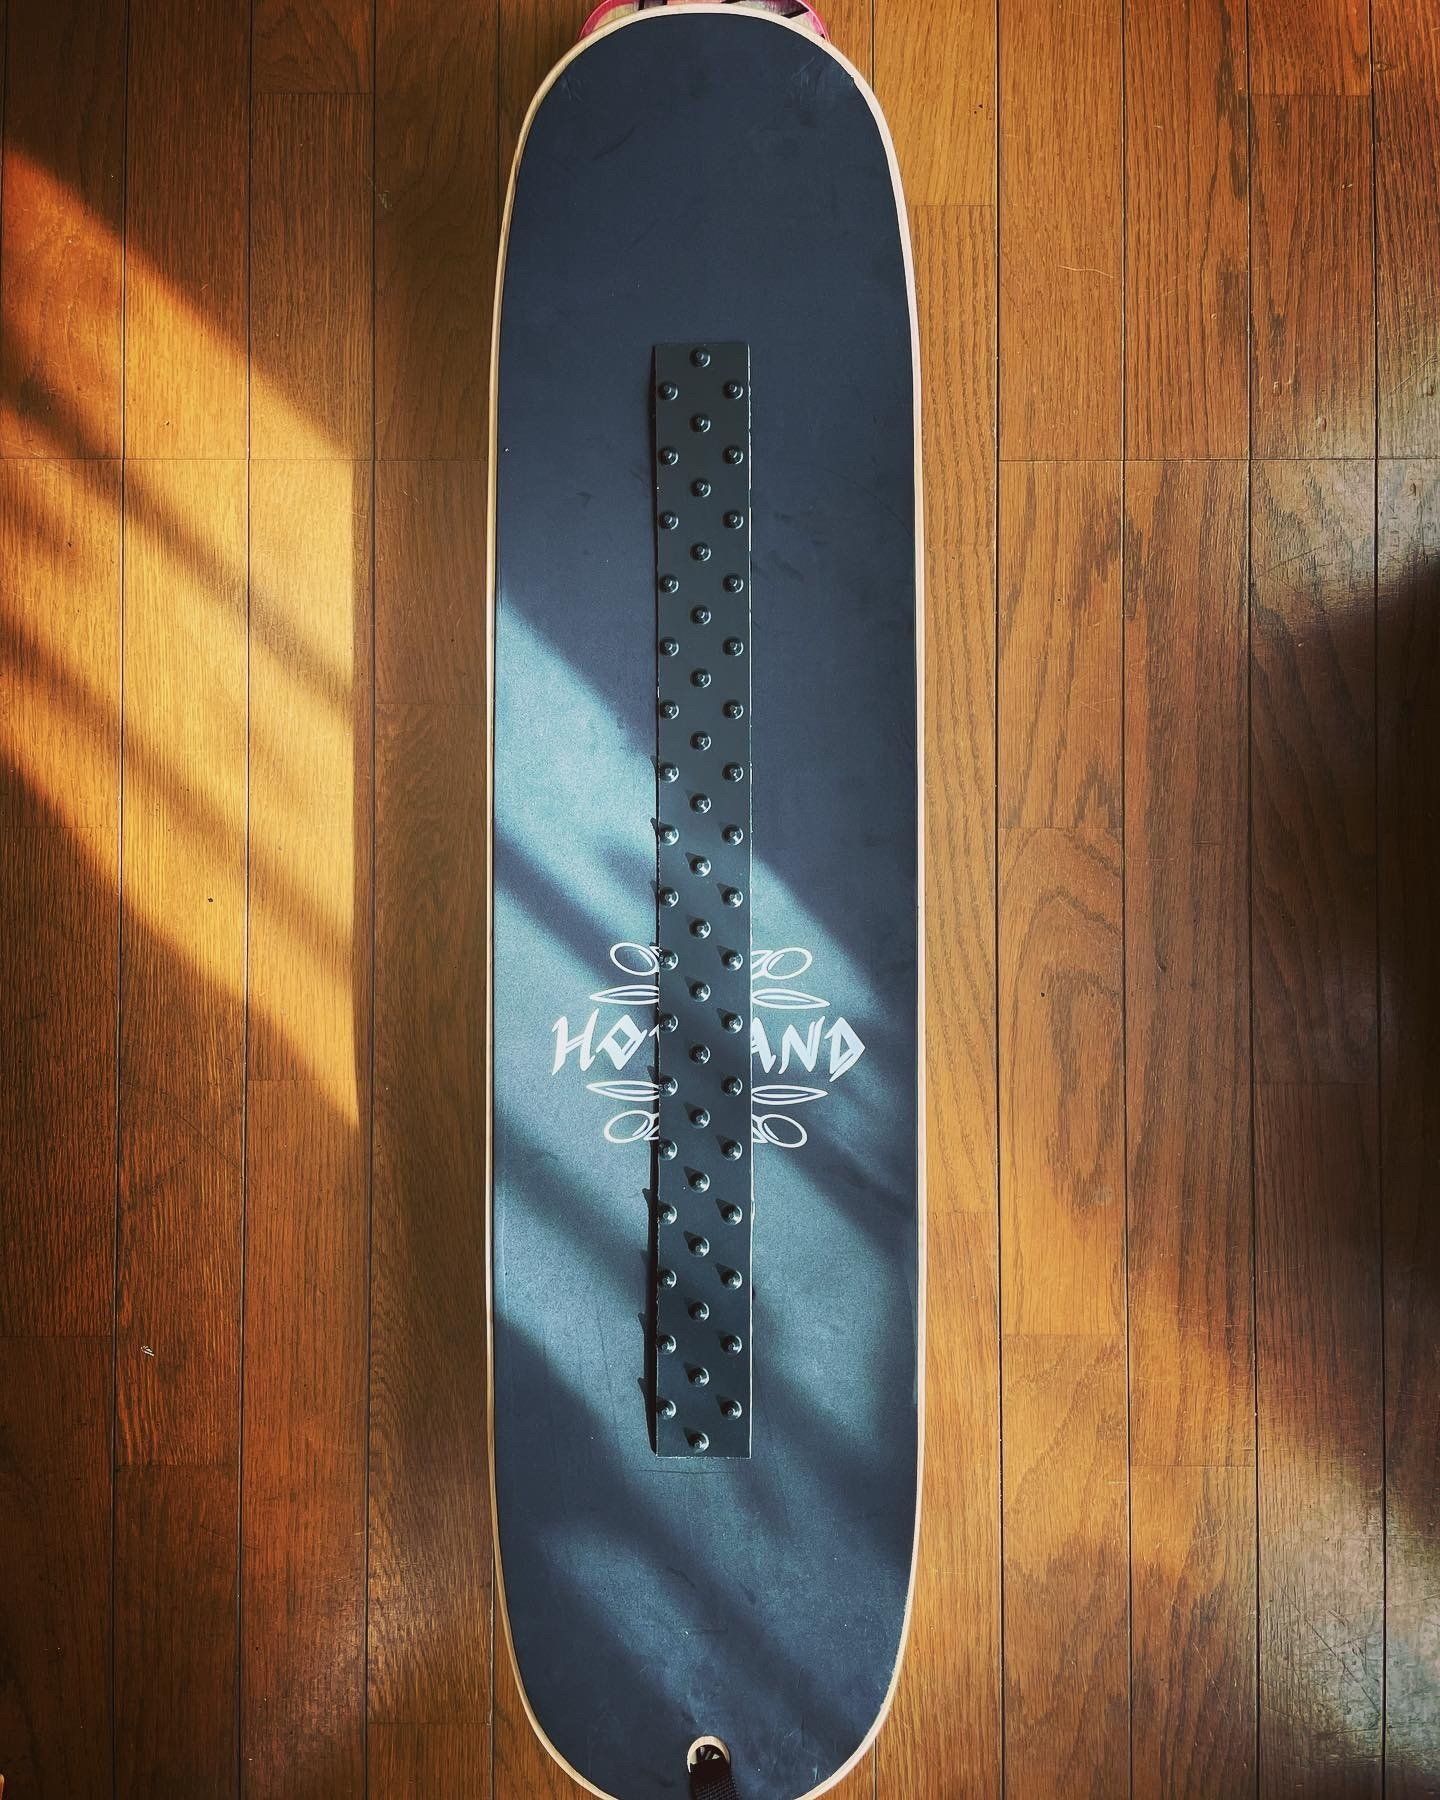
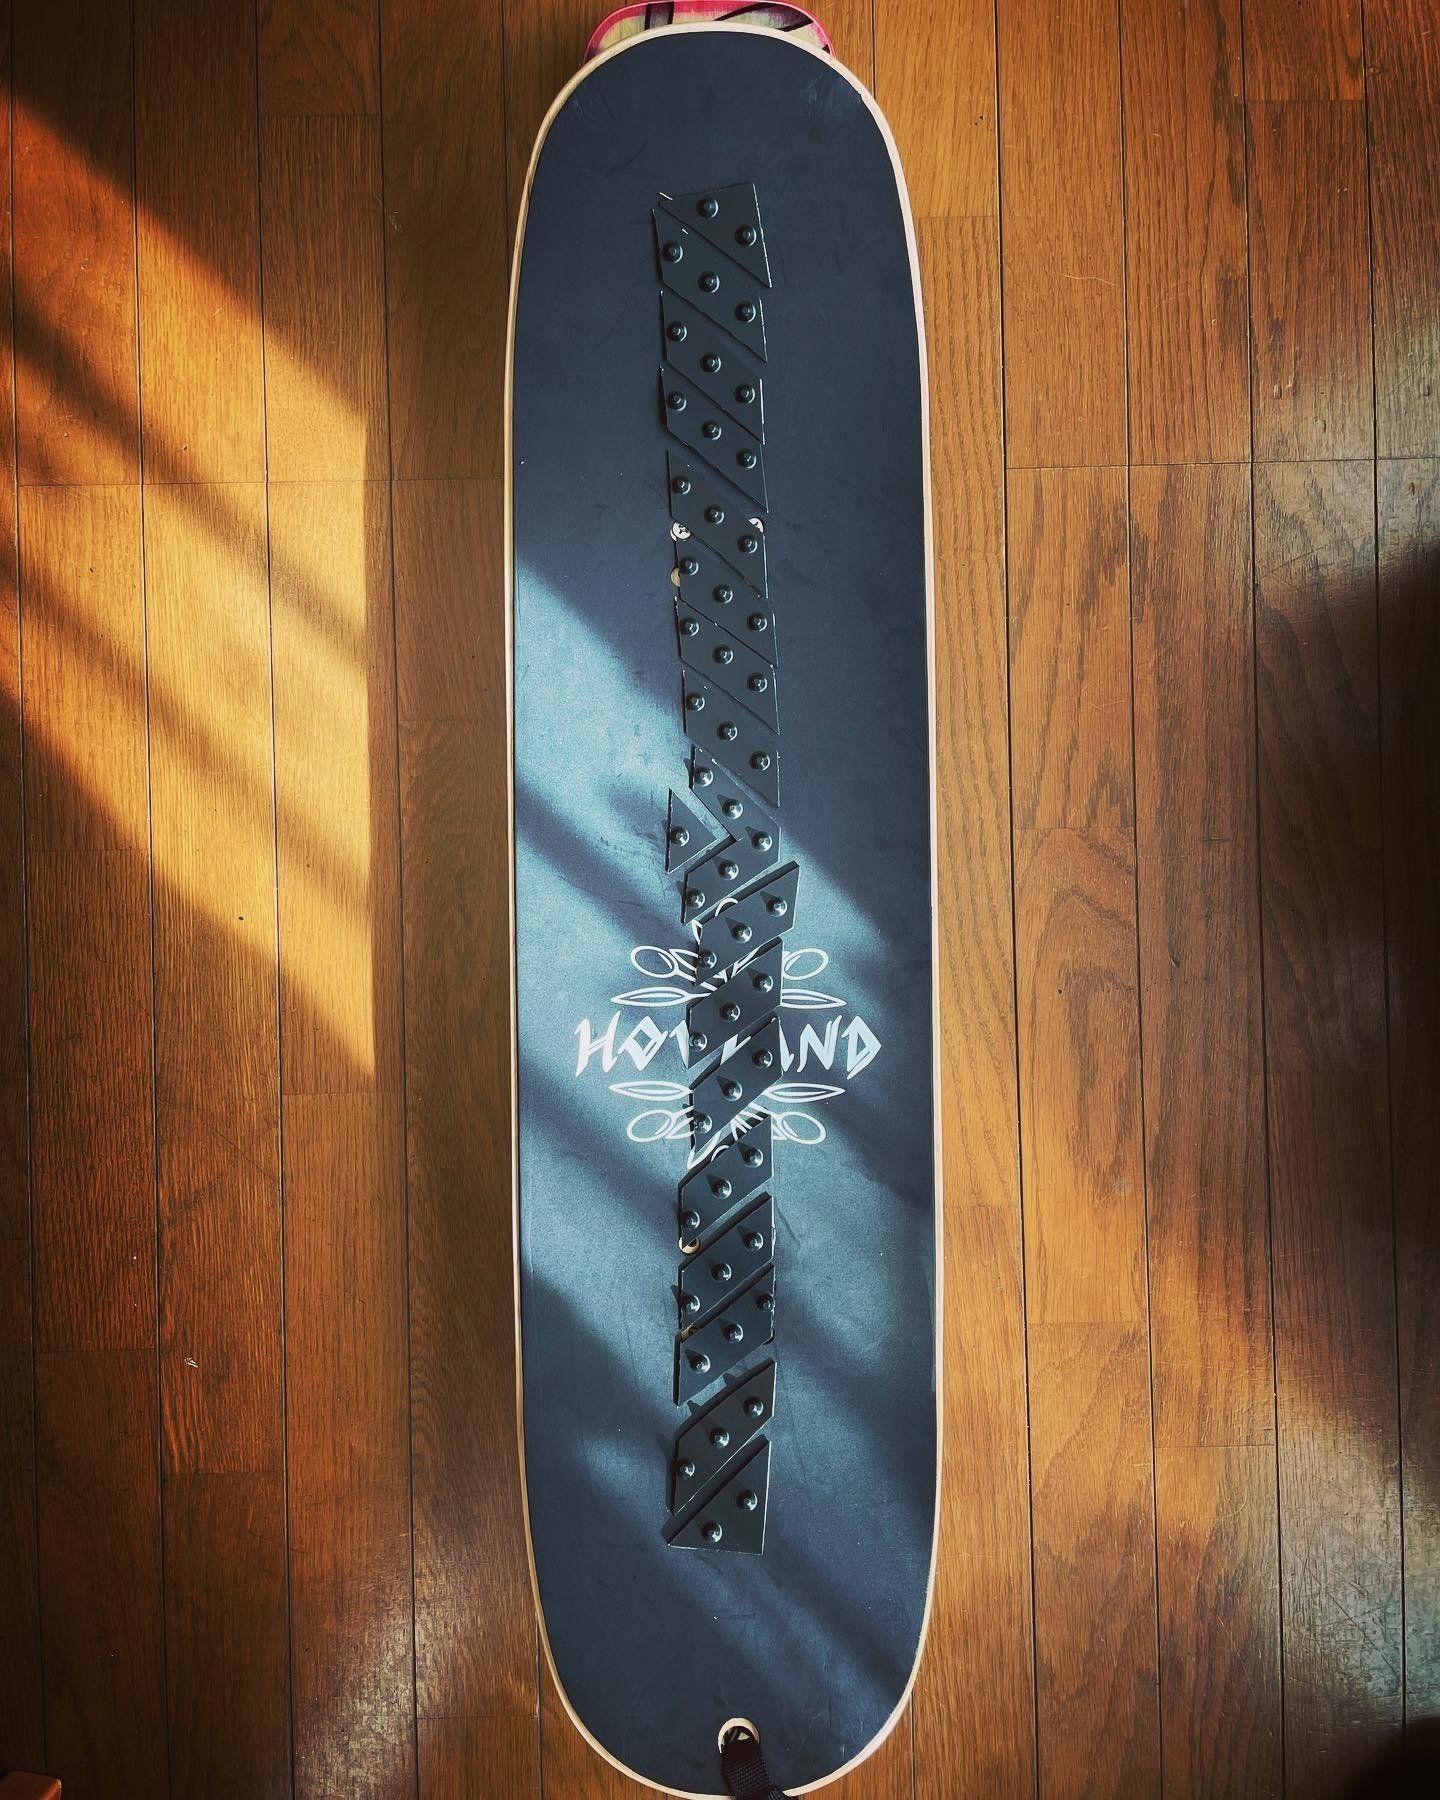

GripAll Tundra Sheet, Size S, Usage Example
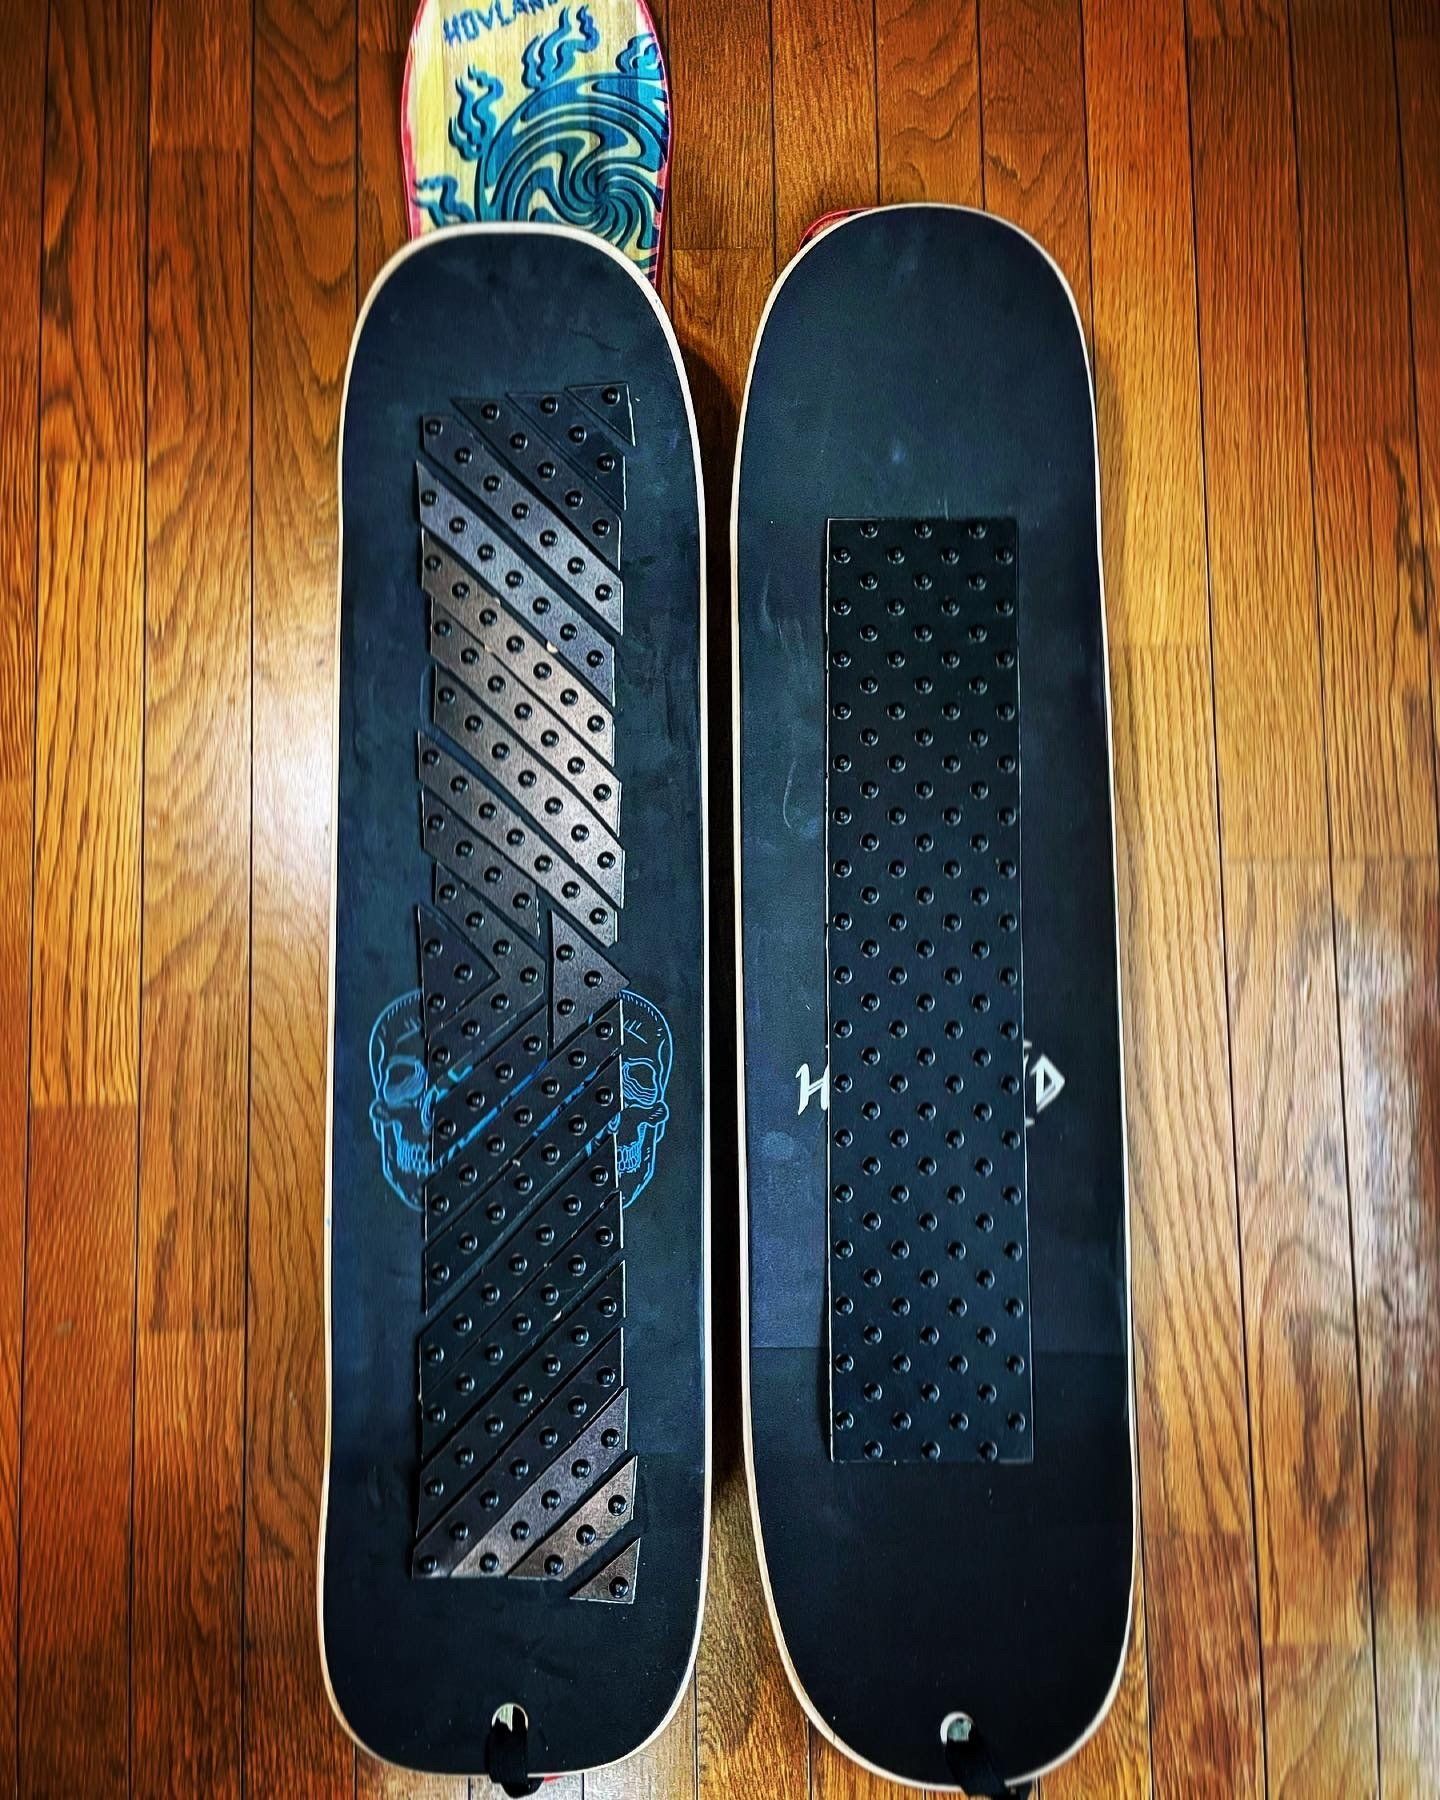
GripAll Tundra Seat, Medium Size GripAll Tundra Seat, Medium Size
Example of using two snow skates Example of using one snow skate
maintenance
The top deck is made of wood, so please allow it to dry thoroughly after use.
If left wet or exposed to the elements, it will quickly deteriorate.
Just like with skateboards, the top deck is a consumable item, so we recommend replacing it with a new one once it has deteriorated to a certain extent.
Apply glide wax to the sub-deck before use.
The waxing method is the same as for snowboards and skis.
After use, clean off any dirt and allow to dry thoroughly.